¶ Client Control Panel
After creating a token and adding it to the flash drive containing the WIPERAPP ISO, it’s crucial to familiarize yourself with the WIPERAPP Client Control Panel before beginning the wiping process. This central interface serves as the hub for managing and executing secure wiping operations.
Let’s get started 🚀
¶ WIPE ALL
The WIPE ALL button in the WIPERAPP Client Control Panel initiates the secure wiping of all connected disks in an IDLE state.
INFO: The IDLE state indicates that no operations are currently being performed on the drive. It is ready for wiping.

NOTE: For detailed guidance on the drive wiping process, refer to the Wiping Drive Data Documentation.
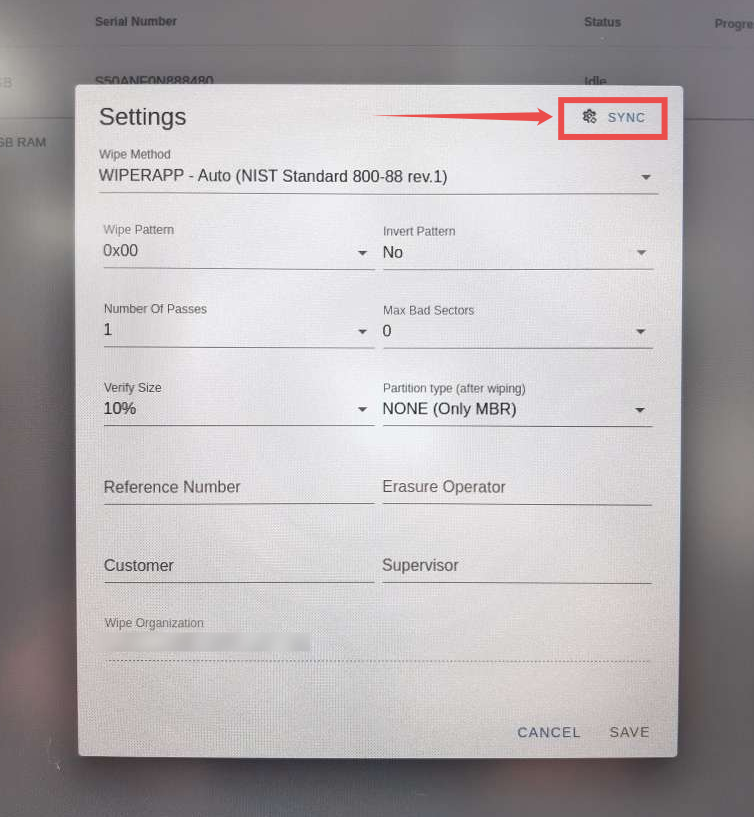
¶ SETTINGS
The Settings section in the WIPERAPP Client Control Panel is a crucial feature for configuring and managing the data-wiping process. You can change or update settings for the wiping operation, giving you complete control over how the data sanitization process is carried out.
¶ SYNC Feature
The SYNC feature allows you to synchronize the settings with those defined in the WIPERAPP Admin Panel. For example, if you’ve customized wiping settings in the Admin Panel, such as the number of overwrite passes or enabling specific erasure methods, using the
SYNC feature will ensure that these changes are immediately applied to your current session.
Step 1: Click on the SETTINGS button in the WIPERAPP Control Panel.

Step 2: Click the SYNC button to synchronize the settings with the WIPERAPP Admin Panel. This will pull all the settings to your account that have already been applied in the Admin account.
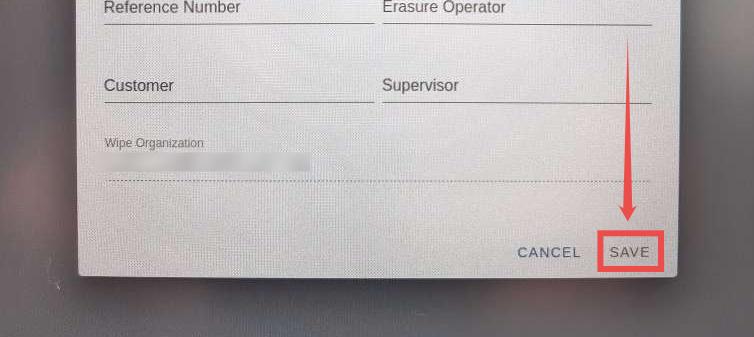
Step 3: Click on the SAVE button to proceed.
NOTE: For detailed guidance on specific configurations, refer to the Settings documentation.
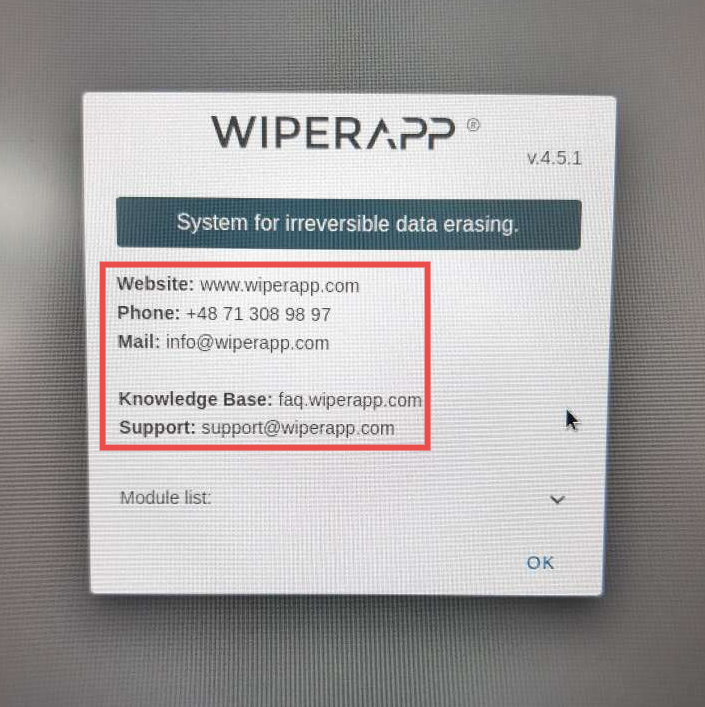
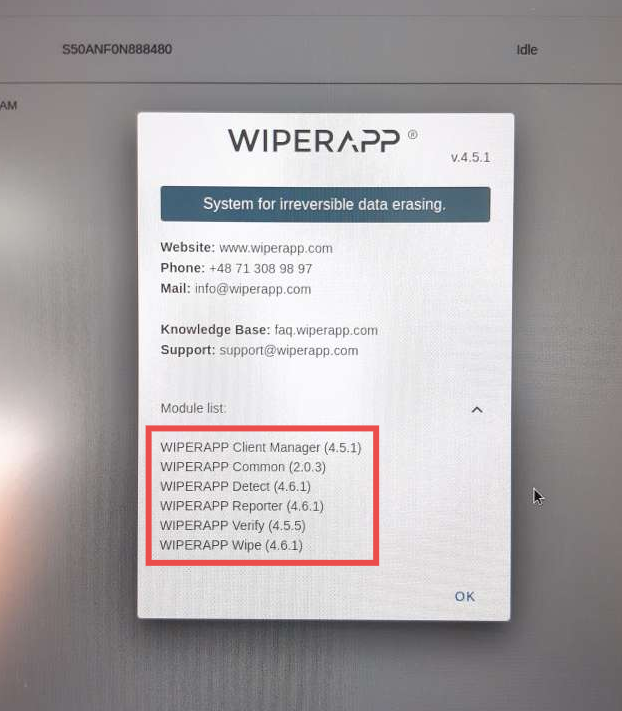
¶ ABOUT
The ABOUT section in the WIPERAPP Client Panel offers a clear and concise overview of WIPERAPP and its supported resources.
Click on the ABOUT button in the Client Control Panel.

The following details will be displayed after clicking on the ABOUT button.
¶ Software Version
The current version of the WIPERAPP software (v4.5.1) is shown.

¶ Support Resources
| Resource | Description |
| Website | The official WIPERAPP website for general information and resources. |
| Phone | Contact number for immediate support or inquiries. |
| General email for communication with WIPERAPP. | |
| Knowledge Base | WIPERAPP’s documentation repository for self-service support. |
| Support | Dedicated email address for technical support. |
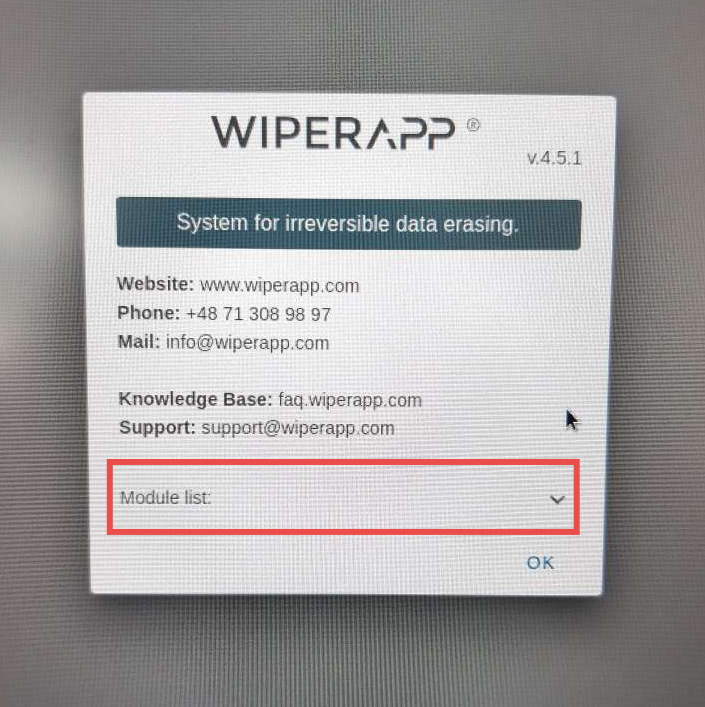
¶ Module list
Module list displays additional details or modules used in the WIPERAPP software. Click on the Module list to view additional modules.
INFO: A Module refers to a specific functional component that performs a distinct task, contributing to the overall functionality of the application.
¶ The Listed Modules
The following table provides an overview of the key modules in WIPERAPP and the roles they play in ensuring secure and efficient data-wiping operations.
| Module Name | Version | Description |
| WIPERAPP Client Manager | 4.5.1 | Manages the interaction between the user and the system, providing the main interface for operations. |
| WIPERAPP Common | 2.0.3 | Handles shared functionalities required by multiple modules for smooth integration. |
| WIPERAPP Detect | 4.6.1 | Identifies connected storage devices and prepares them for the wiping process. |
| WIPERAPP Reporter | 4.6.1 | Generates detailed reports of wiping operations for compliance and auditing. |
| WIPERAPP Verify | 4.5.5 | Verifies that the data has been securely wiped and meets the required standards. |
| WIPERAPP Wipe | 4.6.1 | Performs the actual data wiping operation using selected algorithms. |
¶ RESTART
The RESTART button in the WIPERAPP Client Control Panel restarts the system. Click on the RESTART button.

Click on the YES button to proceed.

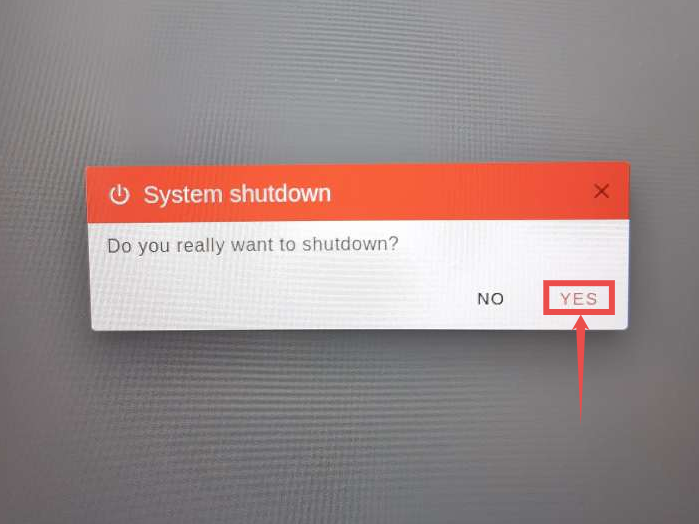
¶ SHUTDOWN
The SHUTDOWN button in the WIPERAPP Client Control Panel powers off the system. Click on the SHUTDOWN button.

Click on the YES button to proceed.
¶ What’s Next?
Explore the View Drive Information documentation next to better understand the WIPERAPP Client Control Panel and its functionalities. It explains how to access and interpret critical drive details, helping you prepare for a wiping operation.