¶ Settings
Configuring settings in WIPERAPP allows you to customize wiping methods, verification parameters, partitioning options, and automation controls to enhance efficiency and security. This documentation explains the settings available at both the Admin Dashboard and Client levels, highlighting their roles in the wiping process.
Let’s get started 🚀
¶ Admin Settings
The Admin Dashboard serves as the primary location for configuring WIPERAPP settings. These configurations take precedence and are automatically synced across all client devices.
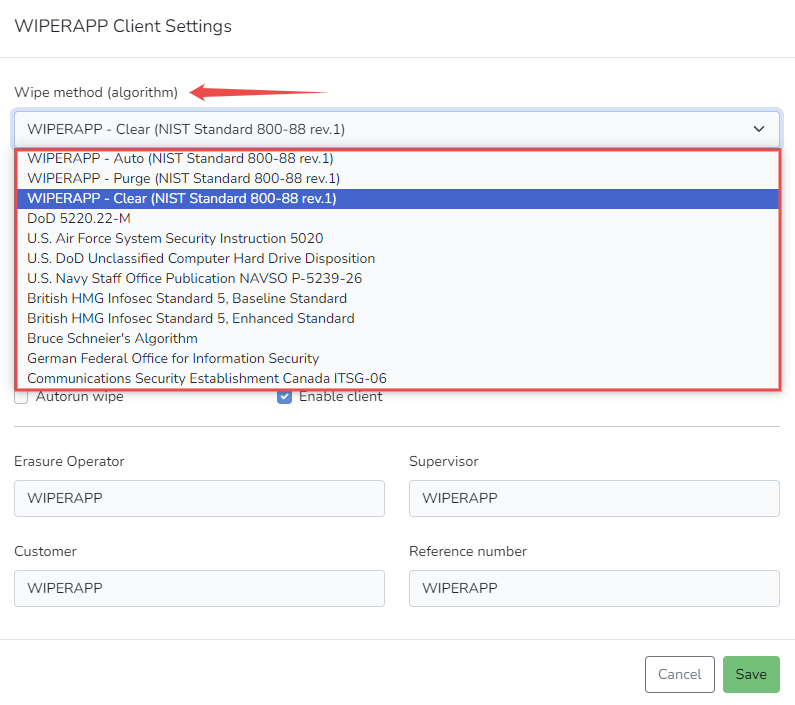
¶ Wipe Method (Algorithm)
WIPERAPP allows you to choose from various data-wiping algorithms that comply with industry standards, ensuring secure and irreversible data erasure. To explore the available algorithms and their specific use cases, refer to the Wiping Algorithms Guide.
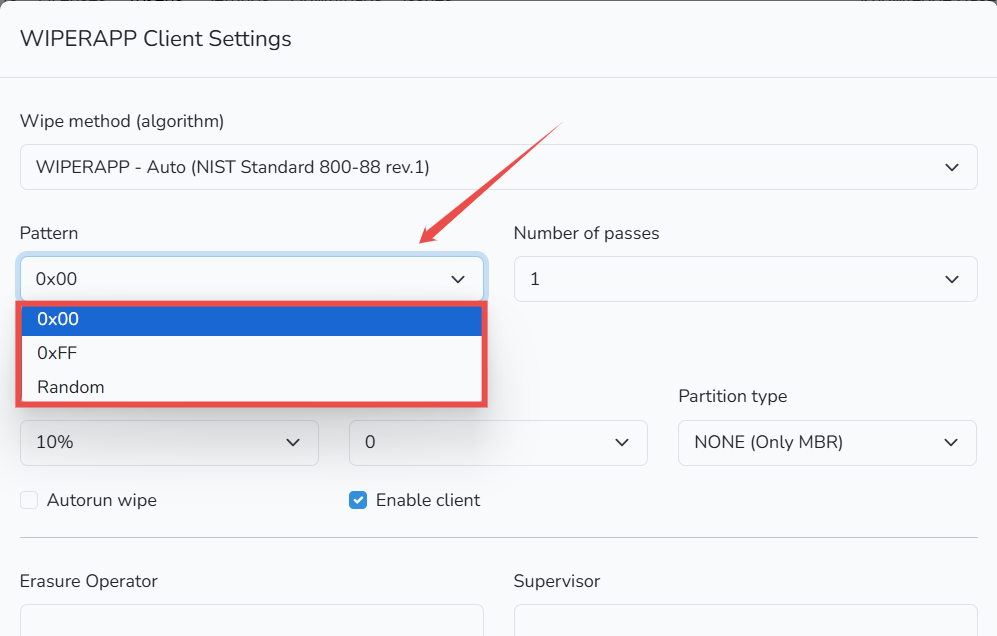
¶ Pattern
The pattern setting allows you to specify the data pattern used during the wiping process. The chosen pattern determines how overwritten data will appear on the drive.
ATTENTION: This setting is only available for the Clear method on HDD and NVMe drives.
INFO: Refer to the Wiping Mechanisms Guide to learn about the Clear method in the data wiping process.
Below are the available patterns and their significance:
| Pattern | Description |
| 0x00 | Fills all sectors with zeros (00 00 00 00), effectively wiping data with a consistent and predictable pattern. Commonly used for simple data erasure when compliance requirements are minimal. |
| 0xFF | Fills all sectors with ones (FF FF FF FF), providing an alternative predictable overwrite pattern. This is sometimes preferred for verifying clear differences from existing data. |
| Random | Overwrites sectors with random data, offering a more secure method to prevent forensic recovery. This is ideal for environments with stringent security policies or higher compliance needs. |
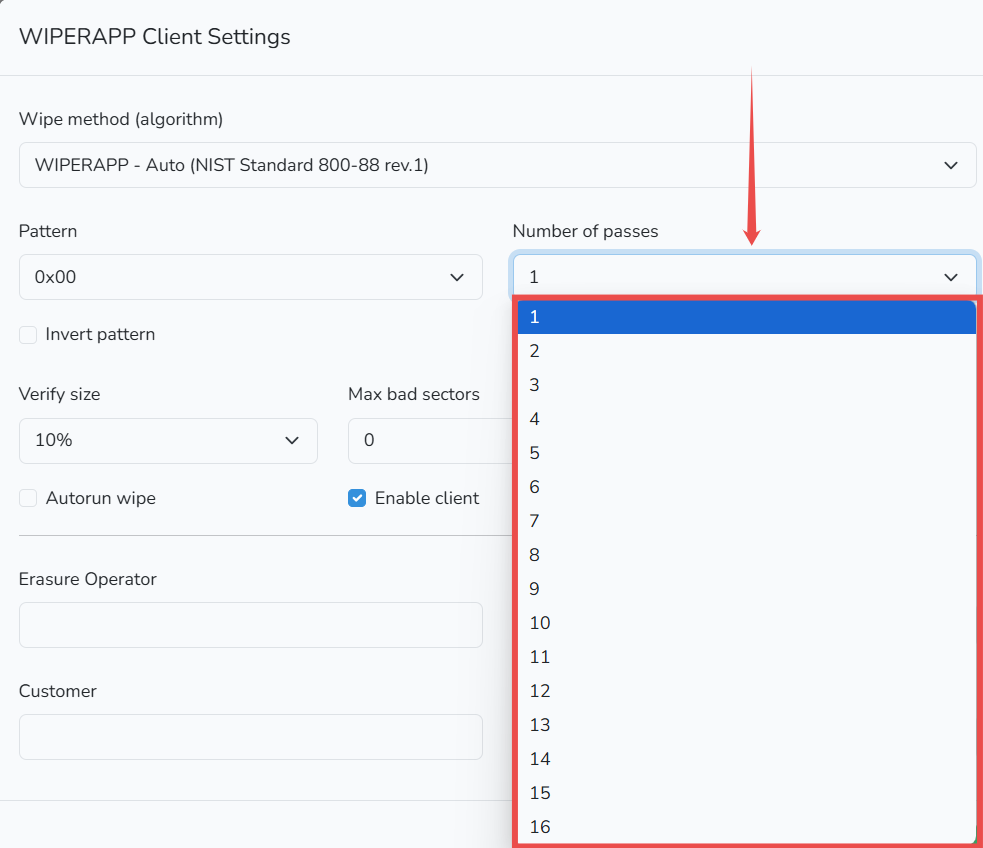
¶ Number of Passes
This setting determines how many times the selected pattern is written over the data.
NOTE: Increasing the number of passes can enhance data security but may also lengthen the wiping process.
ATTENTION: This option is only available for the Clear method on HDD and NVMe drives.
INFO: Refer to the Wiping Mechanisms Guide to learn about the Clear method in the data wiping process.
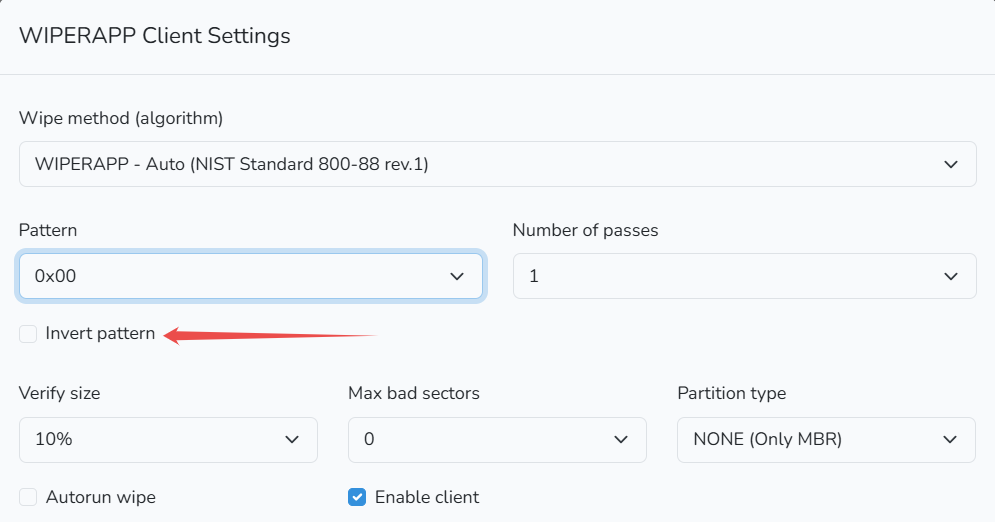
¶ Invert Pattern
The Invert Pattern option in WIPERAPP makes the data wiping process more secure by switching how data is overwritten in each round. For example, in the first pass, it writes all 0s (blank data), and in the next pass, it flips those to 1s (solid data). This back-and-forth pattern makes it harder for anyone to recover erased data.
ATTENTION: This option is only available for the Clear method on HDD and NVMe drives.
INFO: Refer to the Wiping Mechanisms Guide to learn about the Clear method in the data wiping process.
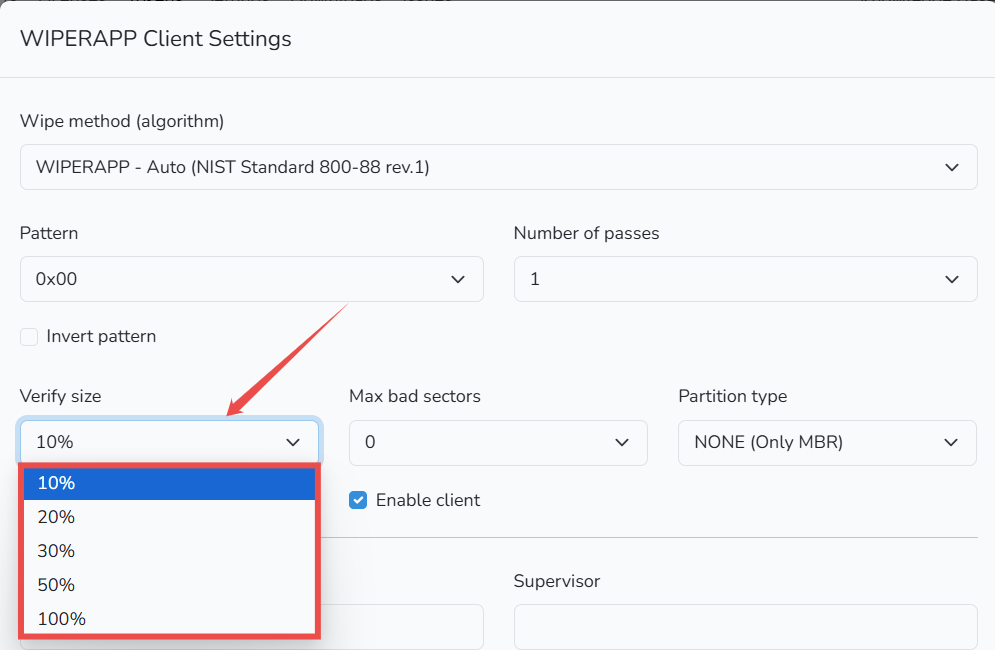
¶ Verify Size
The Verify Size option in WIPERAPP ensures that the data wiping process is accurate by checking a portion of the disk's surface after completion. This feature is critical for verifying that the data has been securely erased and meets industry standards, such as NIST 800-88 rev.1 and IEEE 2883-2022.
By default, WIPERAPP sets the verification size to 10%, which aligns with NIST recommendations. WIPERAPP divides the drive into 1,000 parts and randomly selects at least 2 sectors from each part to confirm that the wiping pattern matches the applied algorithm. This method ensures thorough verification while saving time.
For instance, setting the Verify Size to 10% instructs WIPERAPP to verify 10% of the sectors within each segment of the disk, confirming that the data has been properly overwritten.
IMPORTANT: According to NIST 800-88 rev.1, each data wiping process must be verified on at least 10% of the disk surface. Higher verification percentages may increase processing time but provide additional assurance of data erasure.
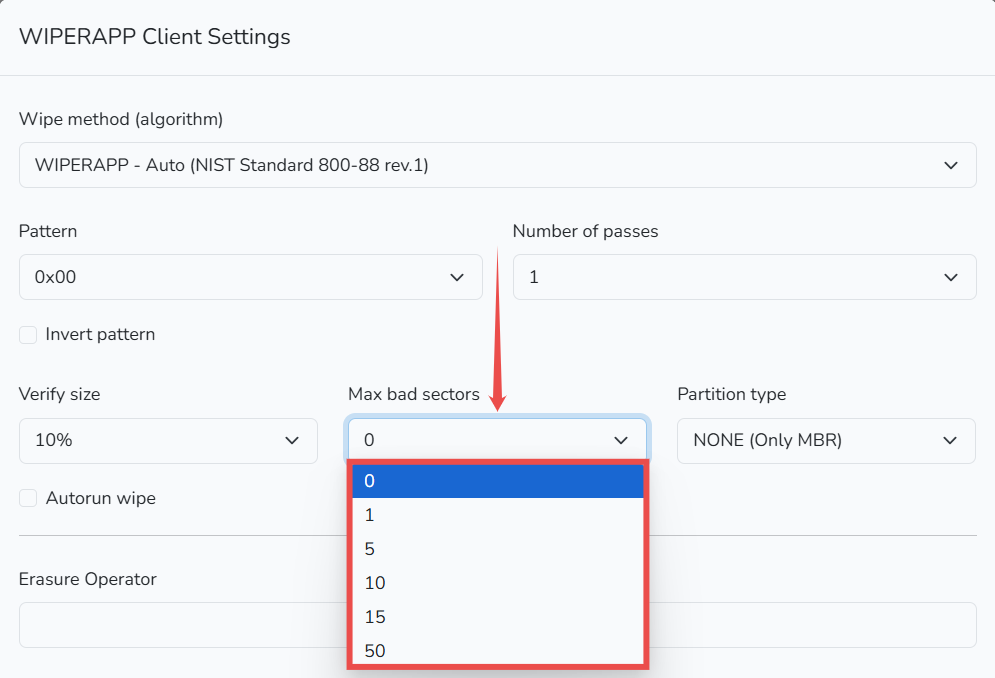
¶ Max Bad Sectors
This setting allows you to define a threshold for the number of bad sectors that are acceptable before the wiping process is flagged for review. Bad sectors are portions of the disk that cannot reliably store data due to physical damage or corruption.
These sectors are typically identified by the drive’s S.M.A.R.T. (Self-Monitoring, Analysis, and Reporting Technology) system. If the number of bad sectors exceeds the set threshold, a warning will be displayed before confirming the data deletion process. This information will also appear in the wiping report.
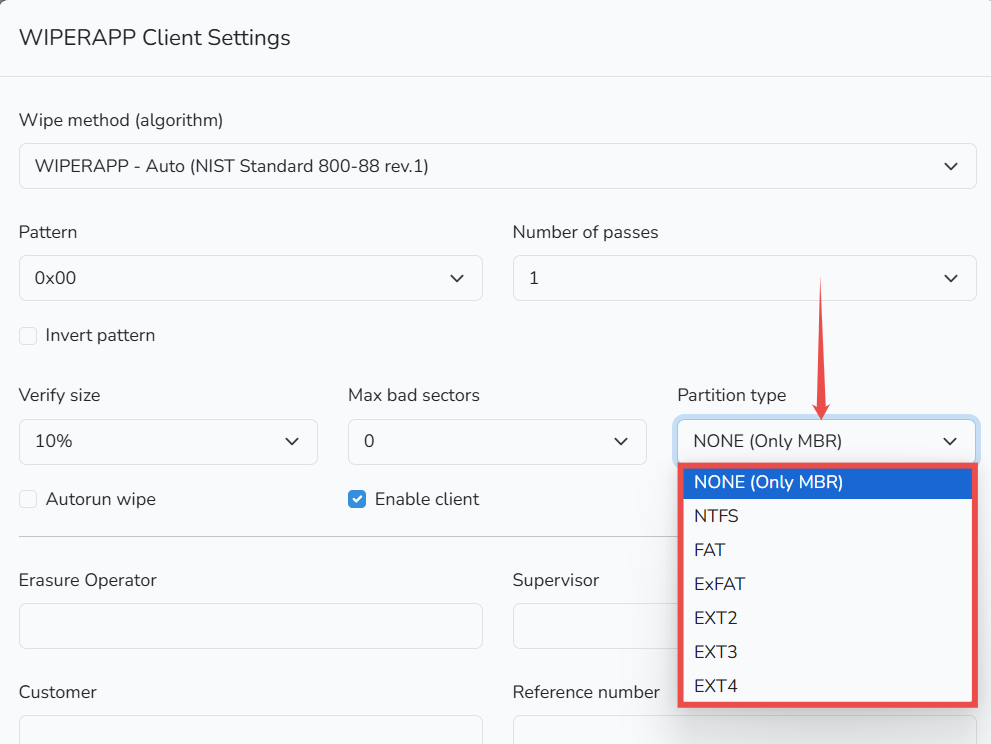
¶ Partition Type
WIPERAPP offers a range of partition types that you can apply to a wiped disk. Selecting the appropriate partition type ensures the drive is properly formatted and recognized by the system after wiping. Here’s a breakdown of the available partition options:
| Partition Type | Description | Use Case |
| NONE (Only MBR) | No partition table is created. The Master Boot Record (MBR) is updated to display wiping details performed by WIPERAPP. | Use when the disk does not need further formatting but needs visibility for auditing purposes. |
| NTFS | A modern file system primarily used by Windows operating systems. It supports large file sizes and advanced permissions. | Ideal for disks intended for use on Windows systems with advanced features. |
| FAT | A simple and older file system supported by almost all operating systems. It has file size limitations (up to 4GB). | Use for maximum compatibility with older devices or when working with smaller files. |
| ExFAT | An extension of FAT designed for large file storage, supporting file sizes over 4GB. Compatible with both Windows and macOS. | Best for external drives that need compatibility across multiple systems. |
| EXT2 | A Linux-based file system without journaling capabilities, offering faster performance but less reliability for power failures. | Suitable for Linux systems where speed is prioritized over resilience. |
| EXT3 | An updated version of EXT2 with journaling support, which enhances reliability by protecting against data corruption during unexpected shutdowns. | Ideal for Linux systems where data reliability is crucial. |
| EXT4 | The most modern Linux file system, offering journaling, better performance, and support for larger volumes. | Recommended for Linux systems requiring speed, reliability, and scalability. |
By default, WIPERAPP sets the partition type to NONE (Only MBR)
¶ Autorun Wipe
Enabling this option will automatically start the data wiping process according to the selected settings when the application is launched.
TIP: If you need to stop a process that has already started (e.g., to change information that should be included in the wiping report), you can perform a hard reset by holding down the computer's power button.

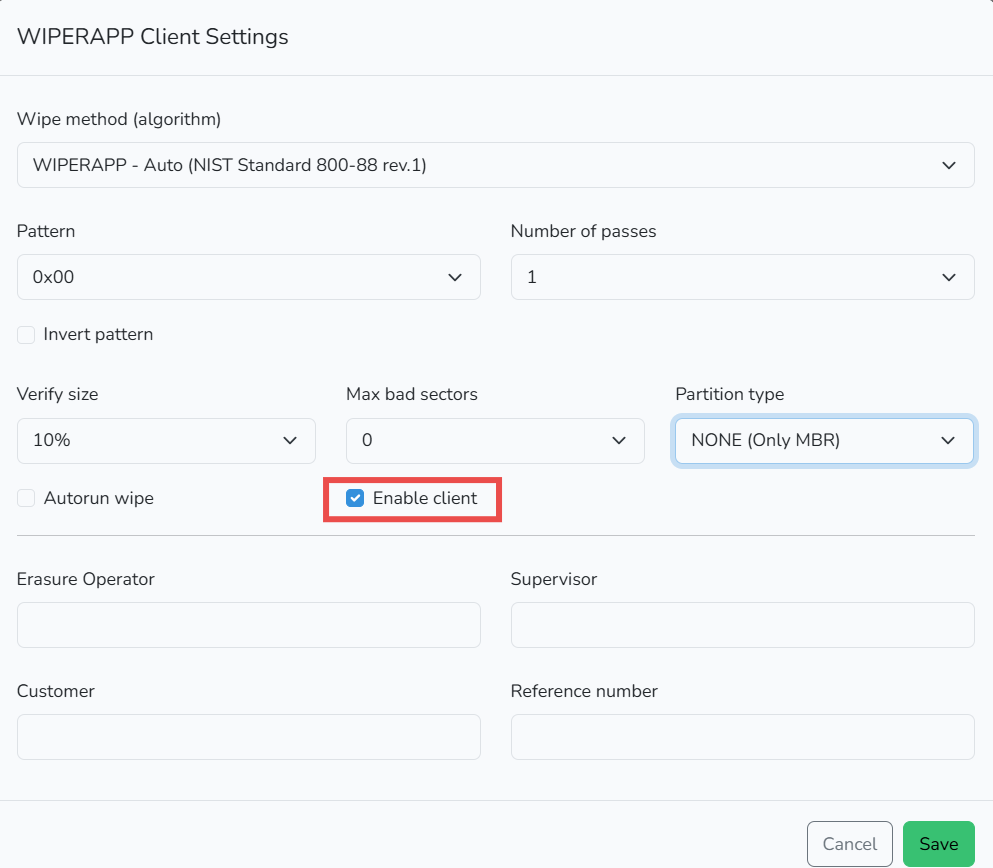
¶ Enable Client
Selecting this option grants the operator full access to the settings during the data wiping process. Leaving it unchecked restricts the operator to editing only the fields: Erasure Operator, Supervisor, Customer, and Reference Number.
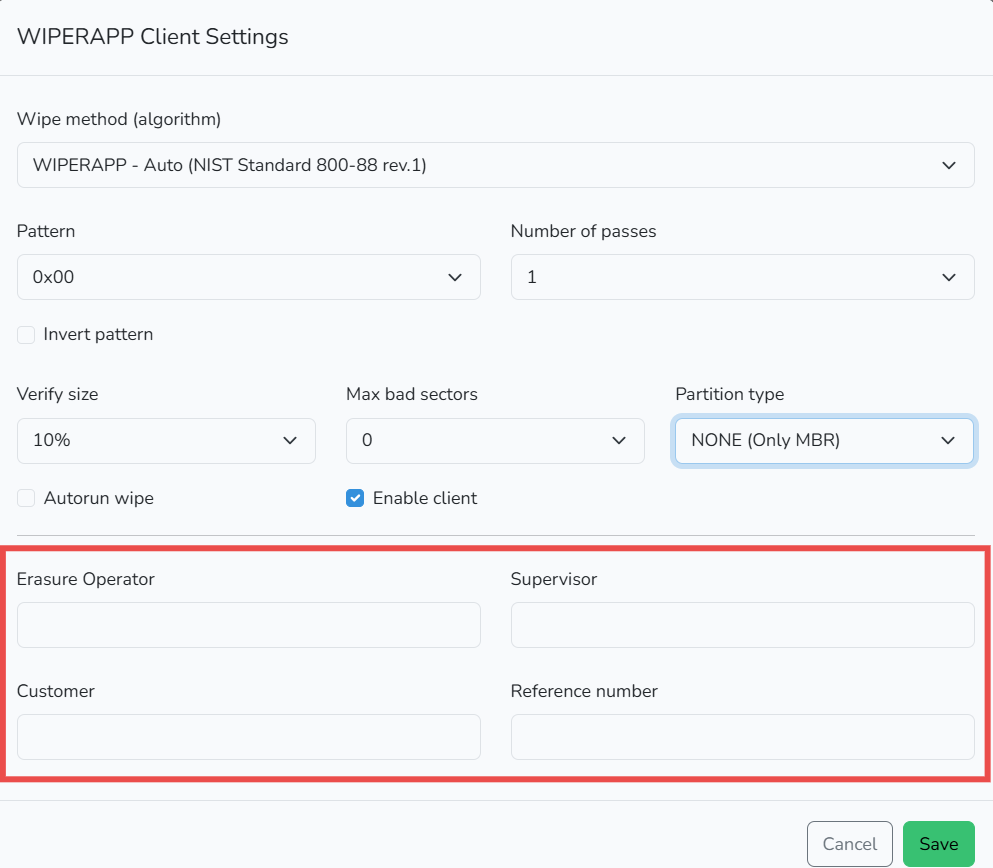
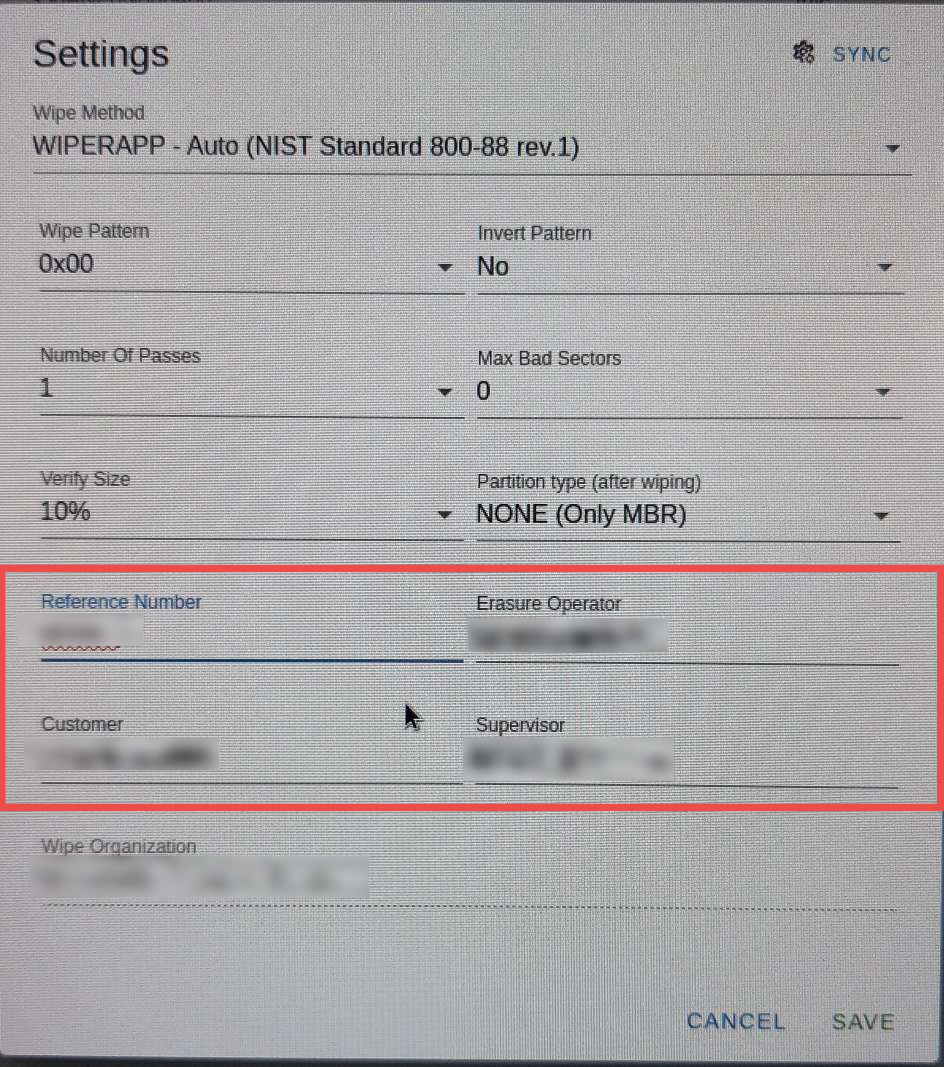
¶ Erasure Operator, Supervisor, Customer, Reference number
According to NIST 800-88 rev.1, including this information in the data erasure report ensures traceability and verification. Additionally, these fields can be edited at any time from both the Admin and Client levels, making them flexible for various use cases.
| Field | Description |
| Erasure Operator | The name or ID of the individual performing the data erasure process. This ensures accountability by identifying who executed the wipe. |
| Supervisor | The name or ID of the person overseeing or approving the wiping operation. This adds a layer of responsibility and approval for compliance. |
| Customer | The name of the organization, client, or individual for whom the drive is being wiped. This ensures the report reflects the correct ownership or requestor of the operation. |
| Reference Number | A unique identifier (such as a job number, ticket ID, or project reference) associated with the wiping process. This helps in organizing and retrieving reports easily for audits or future reference. |
IMPORTANT: Settings configured in the Admin Dashboard automatically propagate to all connected clients. Operators at the client level cannot override these settings unless Enable Client is activated.
¶ Client Settings
Client-side settings are limited unless the Enable Client option is activated in the Admin Dashboard. This ensures centralized control while allowing basic customization where necessary.
¶ Editable Fields on Client
When Enable Client is disabled, operators can only modify:
- Erasure Operator
- Supervisor
- Customer
- Reference Number
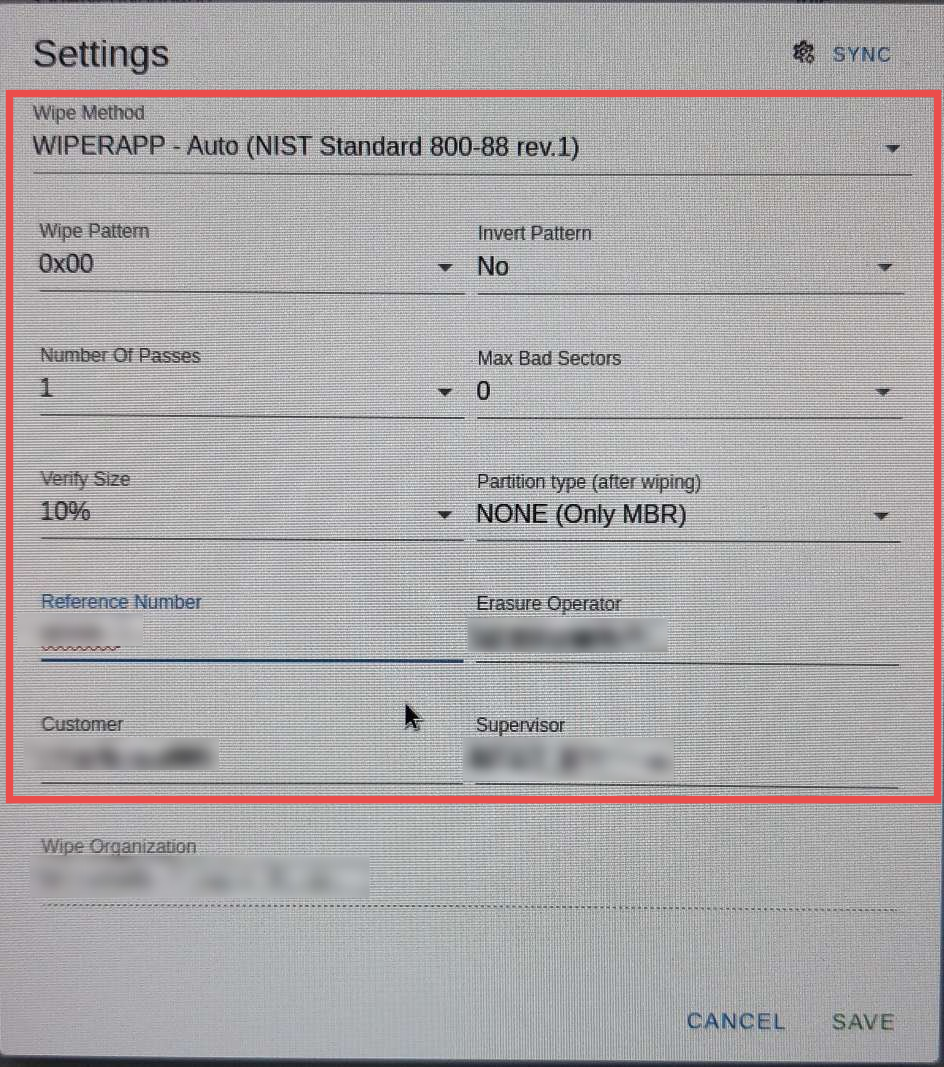
¶ Full Configuration on Client
When Enable Client is activated, operators can access all settings, including:
- Wipe Method
- Wipe Pattern and Invert Pattern
- Number of Passes
- Verify Size
- Partition Type
- Max Bad Sectors
After configuring the necessary settings and understanding the details provided in this documentation, you're ready to proceed with the data wiping process. For a comprehensive guide on how to wipe drives effectively, refer to the Wiping Drive Data Documentation for detailed step-by-step instructions.