¶ Creating a Token
After successfully starting the WIPERAPP ISO, the next step is to create a token to verify your account and enable secure operations. The token contains an API key that adds an additional layer of security by preventing unauthorized access, and ensuring safe and compliant data sanitization. This documentation provides step-by-step instructions to help you create a token effortlessly.
Let’s get started 🚀
Step 1: Sign in to your account and go to the Tokens section from the top to start creating a new token.

NOTE: The token can only be generated from the Admin Panel in the WIPERAPP.
Step 2: Click the Create New Token button to generate a new token.

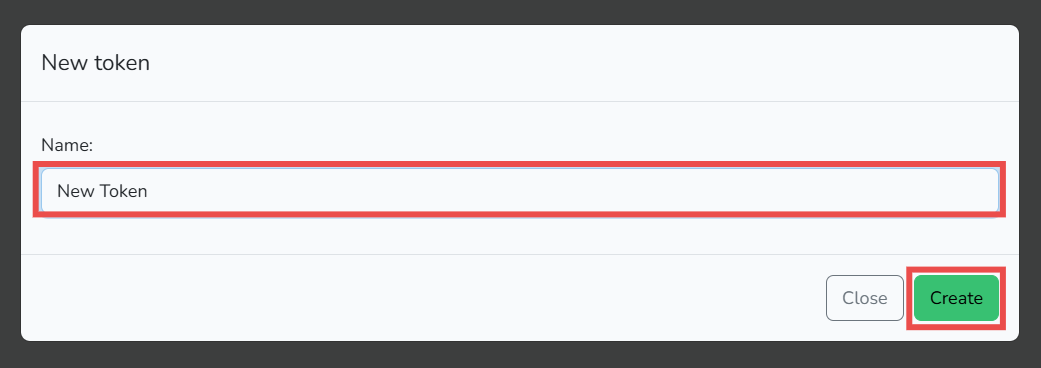
Step 3: Enter a name for the token, then click on the Create button to proceed.
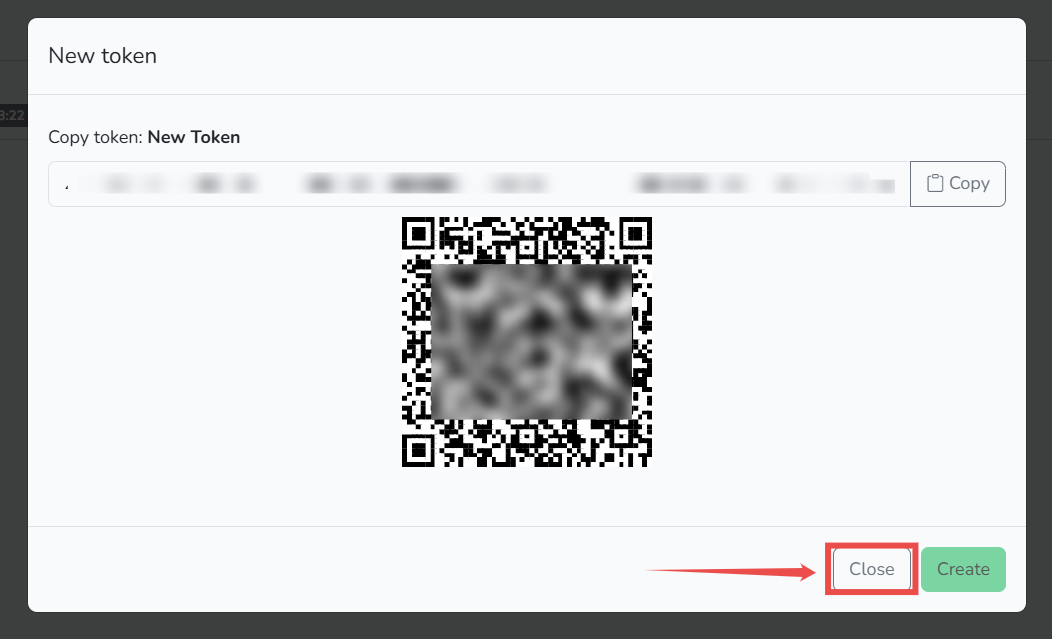
Step 4: The token has been created successfully and the QR code will be produced. You can immediately scan it to retrieve the API key from the generated token.
Click on the Close button to dismiss the modal.
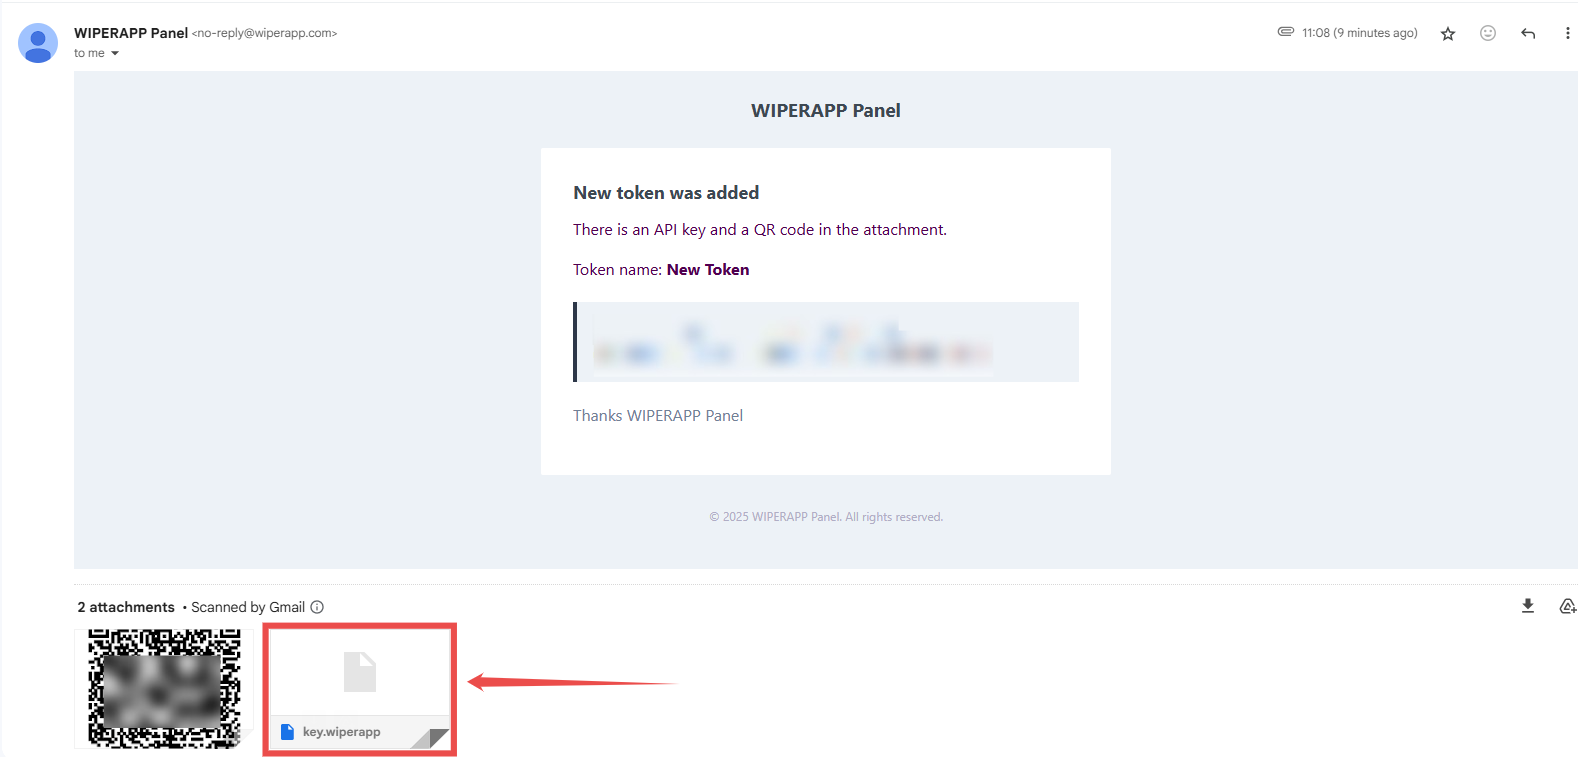
Step 5: After successfully creating a token, WIPERAPP sends a confirmation email to the registered email address.
This email contains the QR code and the Key.wiperapp file. The Key.wiperapp file contains the API key that securely verifies your access and permissions to perform data wiping operations. It serves as an alternative method to using the API key directly in the WIPERAPP flash drive, streamlining the authentication process. You can download the Key.wiperapp file and securely save it on your local system.
After successfully creating the token and securely saving the key.wiperapp file on your local system, the next step is to add the token to the WIPERAPP flash drive.
For detailed instructions on how to add the token to the flash drive, refer to the Adding Token to Pendrive documentation.