¶ Wiping Drive Data
Once you have successfully authenticated the token and verified the purchased licenses, it's time to wipe the drive data. The Wiping Drive Data process ensures secure and permanent deletion of data from the selected drive, making recovery impossible. This documentation provides step-by-step instructions to initiate the data-wiping process efficiently.
Let’s get started 🚀
ATTENTION: WIPERAPP requires the computer system used for data wiping to be connected to the Internet via a LAN cable (RJ45) or by using USB tethering to share the Internet from a mobile phone via a USB cable. The Internet is needed solely to authenticate the token and verify the purchased licenses. After the wiping process starts, the Internet connection is no longer required.
¶ Drive Selection
Select the drive you want to wipe from the list of detected drives. Check its capacity, type, and status to avoid accidentally erasing a critical drive.
INFO: For detailed information about the connected drives, refer to the View Drive Information Documentation.

¶ Wiping Settings
Before initiating a wiping operation, it is crucial to configure or verify the settings to ensure the wiping process meets your specific requirements. The Wiping Settings allow you to tailor the data erasure process based on compliance needs, operational goals, and device-specific parameters.
TIP: To fully configure Client-side settings, you must select Enable Client in your main account settings (Admin Dashboard). If you don’t enable it, you can only fill in or change the following fields: Erasure Operator, Supervisor, Customer, and Reference Number.

INFO: To gain a deeper understanding of the various settings and how to configure them, refer to the Settings Documentation for step-by-step guidance.
If the settings have already been configured in the Admin Panel, you can easily sync these configurations using the Sync Feature available in the settings menu. This ensures consistency and eliminates the need for manual adjustments across different wiping operations.
INFO: To learn how to use the sync feature effectively, refer to the Client Control Panel Documentation for detailed instructions.
The current wiping process will use the settings shown in the provided snippet, including default configurations for the Wipe Method, Wipe Pattern, Number of Passes, Verification Size, and more.
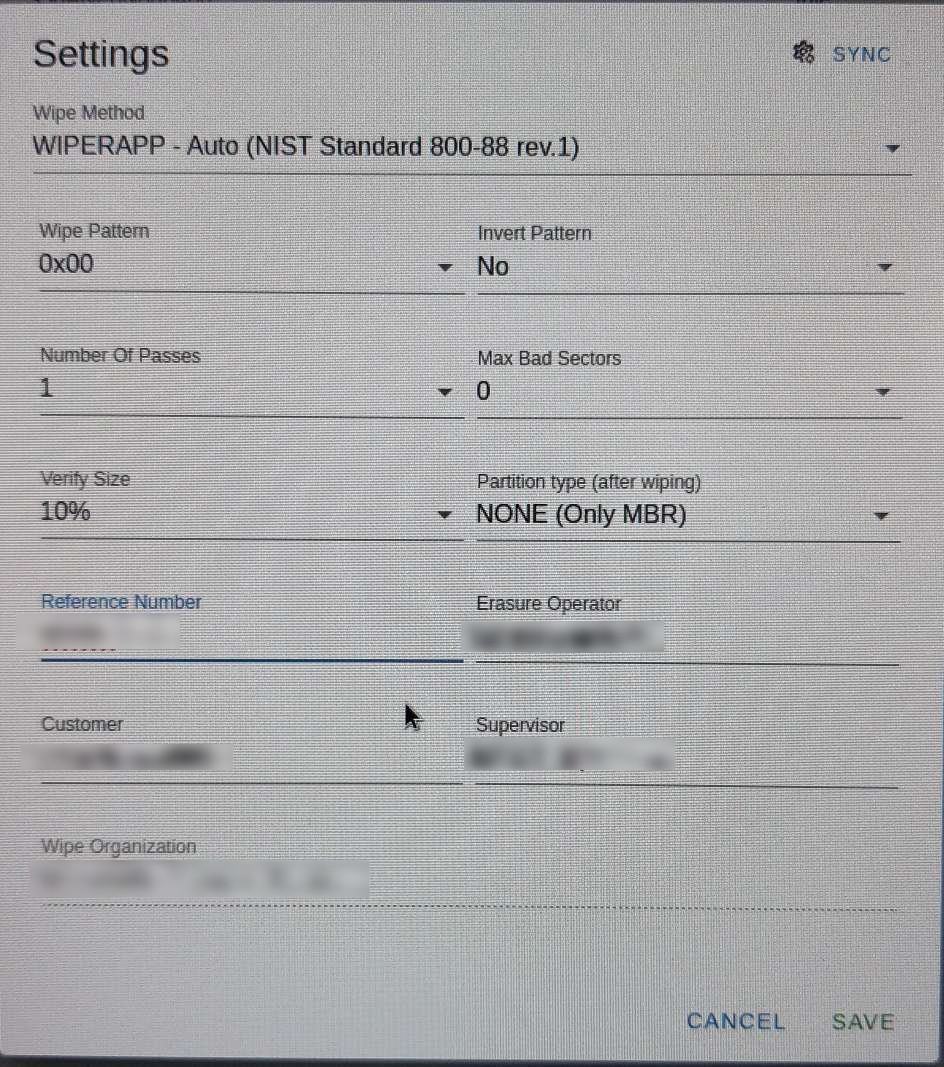
INFO: By default, the Verification Size is set to 10%, which aligns with NIST 800-88 r1 compliance standards. WIPERAPP divides the drive into 1,000 parts, randomly selecting at least 2 sectors per part for verification.
This method ensures accuracy while maintaining efficiency. For stricter compliance or audits, you can adjust the verification size up to 100%, verifying every sector of the drive.
¶ Start Wiping
Once you select the drive you want to wipe and configure the wiping settings, you can begin the wiping operation.
Step 1: Click the Play button to begin the wiping process.

Step 2: Click on the WIPE button to proceed.
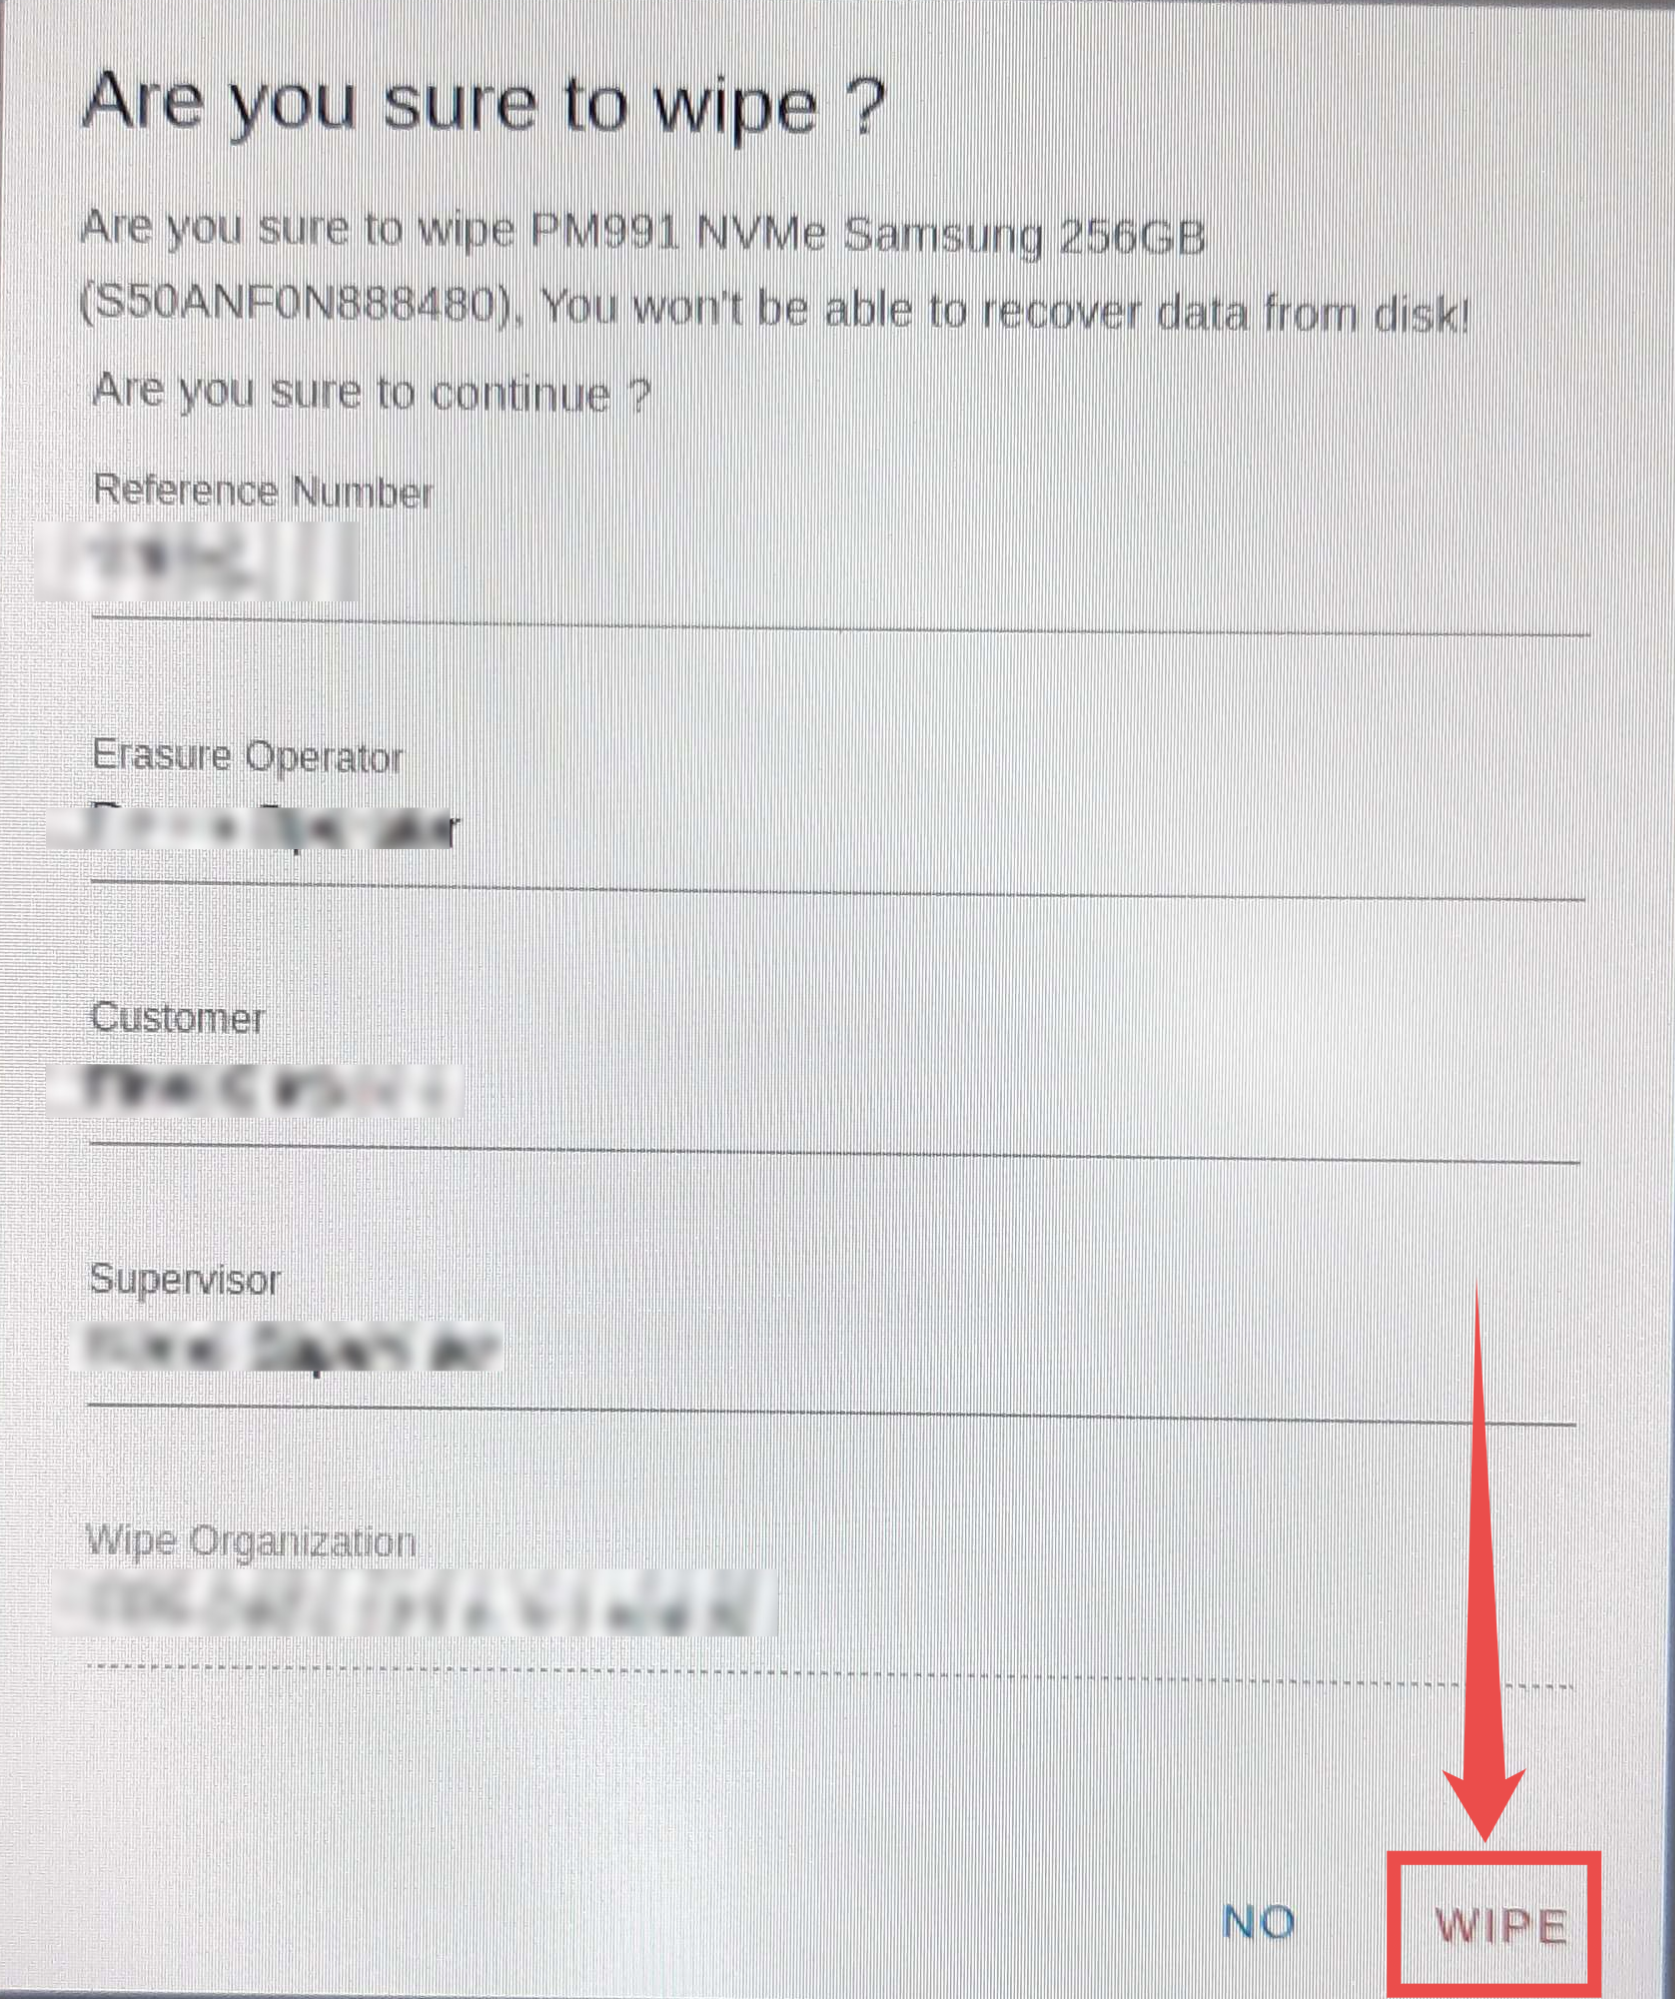
The wiping process will begin on the selected drive. You can track its progress in real-time in the Progress field.
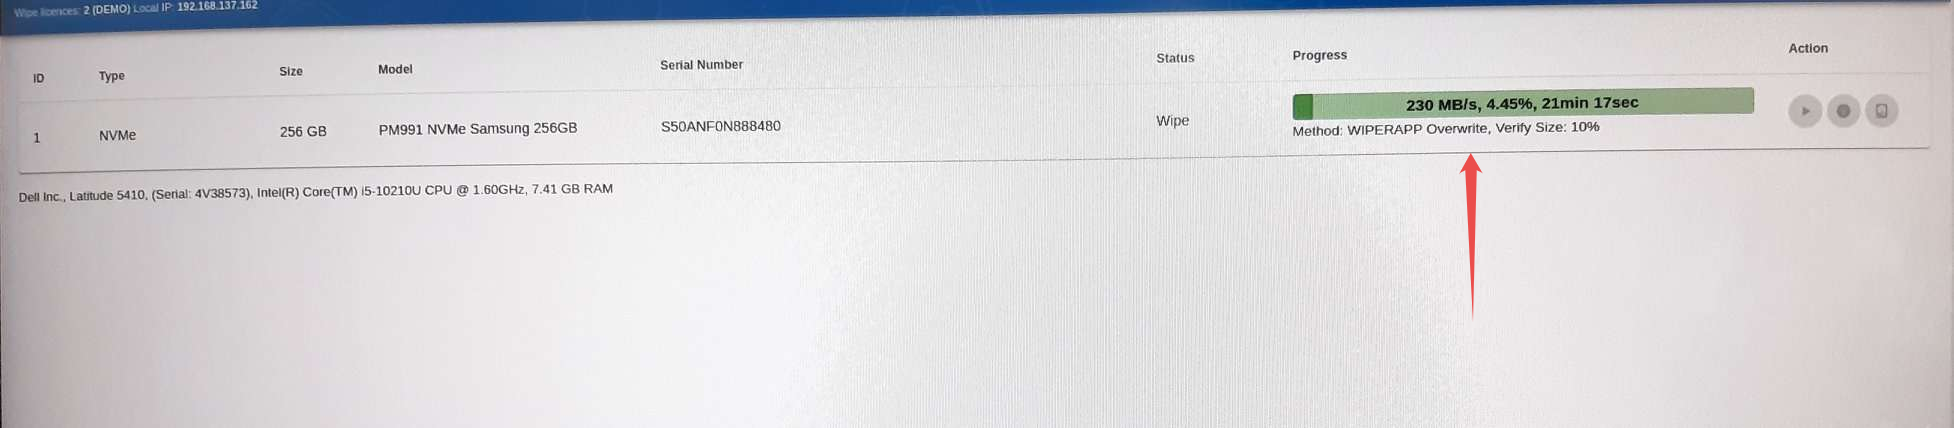
IMPORTANT: It is strongly recommended not to stop the wiping process while the progress bar is green, especially when using secured firmware methods like Security Enhanced Erase, Block Erase, Crypto Scramble Erase, or Cryptographic Erase. Interrupting these processes can potentially damage the drive and render it unusable.
NOTE: The duration of the wiping process may vary depending on the selected configurations, such as the number of passes, verification size, and the size of the drive being wiped.
After the wiping process is complete, the progress bar will change to blue, indicating the verification process. During this stage, WIPERAPP is validating the success of the data erasure.
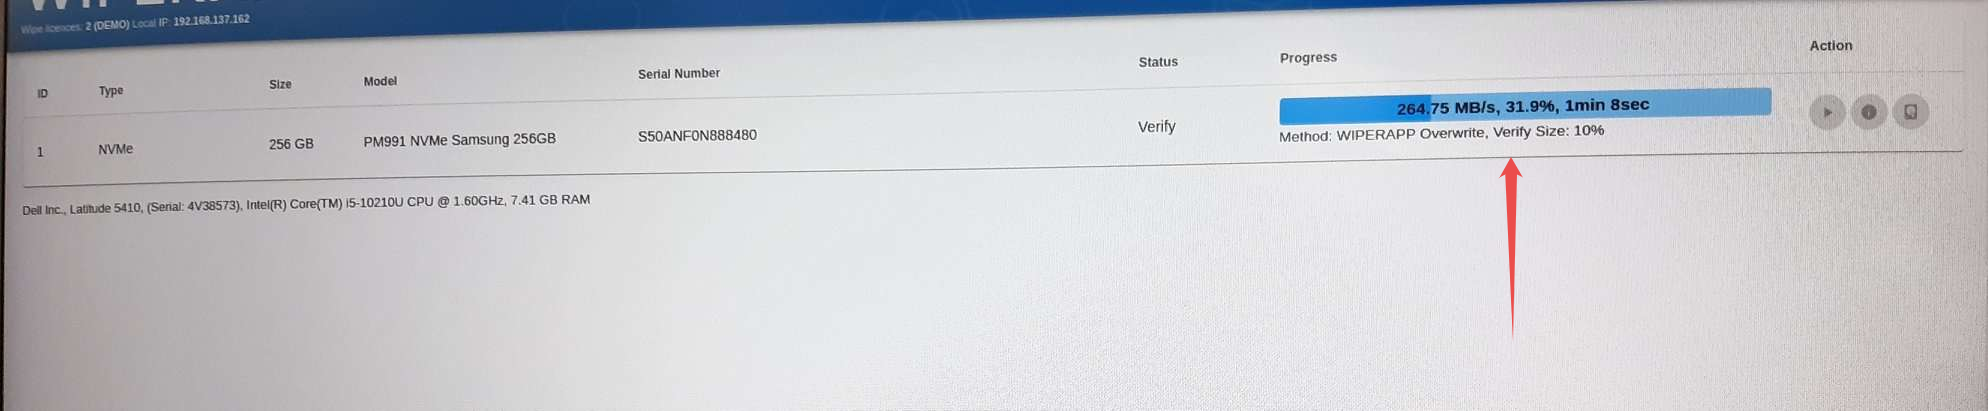
NOTE: If the process is interrupted (e.g., due to a power outage), it is safe for the drives. You can resume the wiping operation without losing the license.
Step 3: Click the NO button to close the modal once the entire wiping and verification process is complete. The status will be updated to Verify Success.
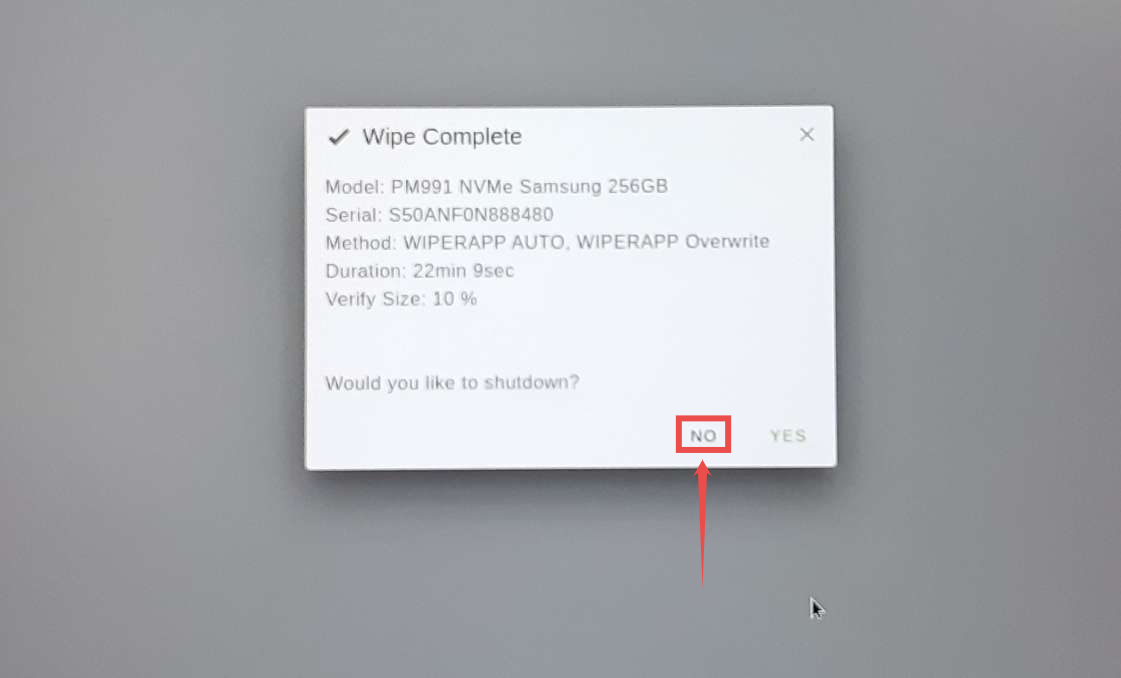

NOTE: If the entire wiping and verification process completes without errors, the whole progress bar will be green.
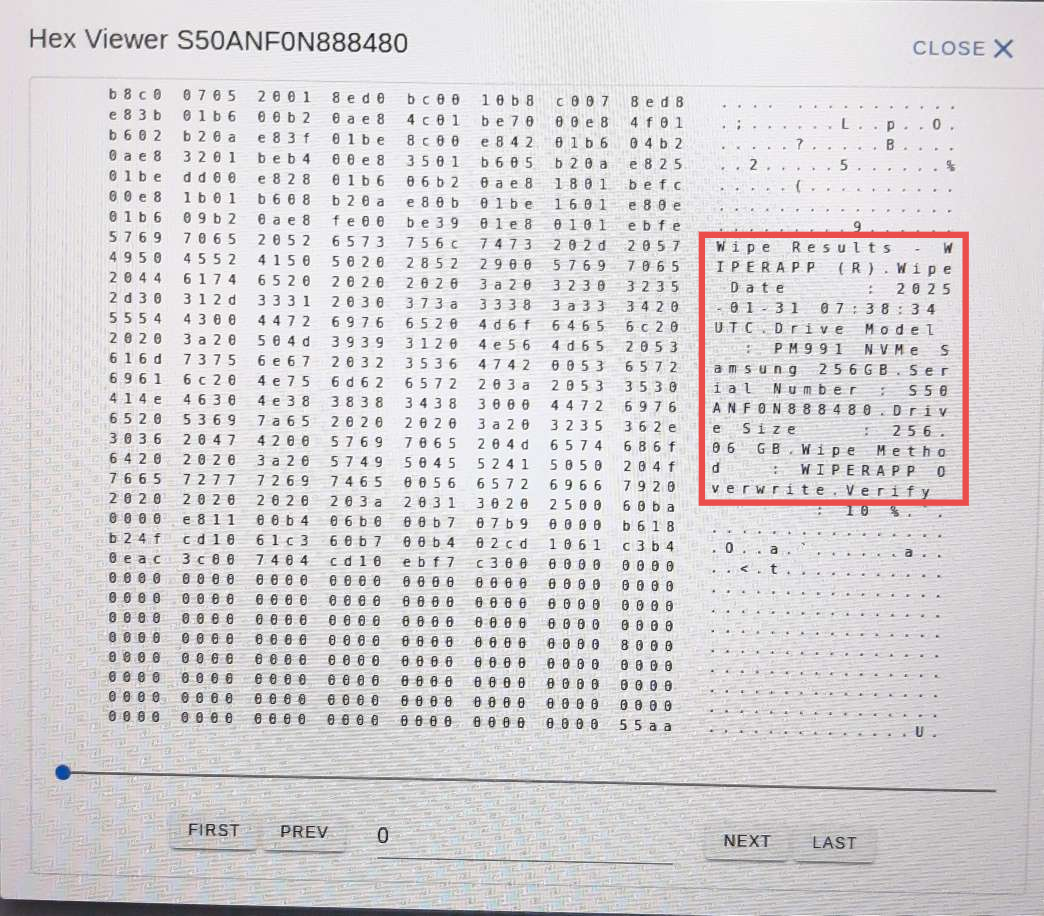
Step 4: Click on the Hex Viewer button.
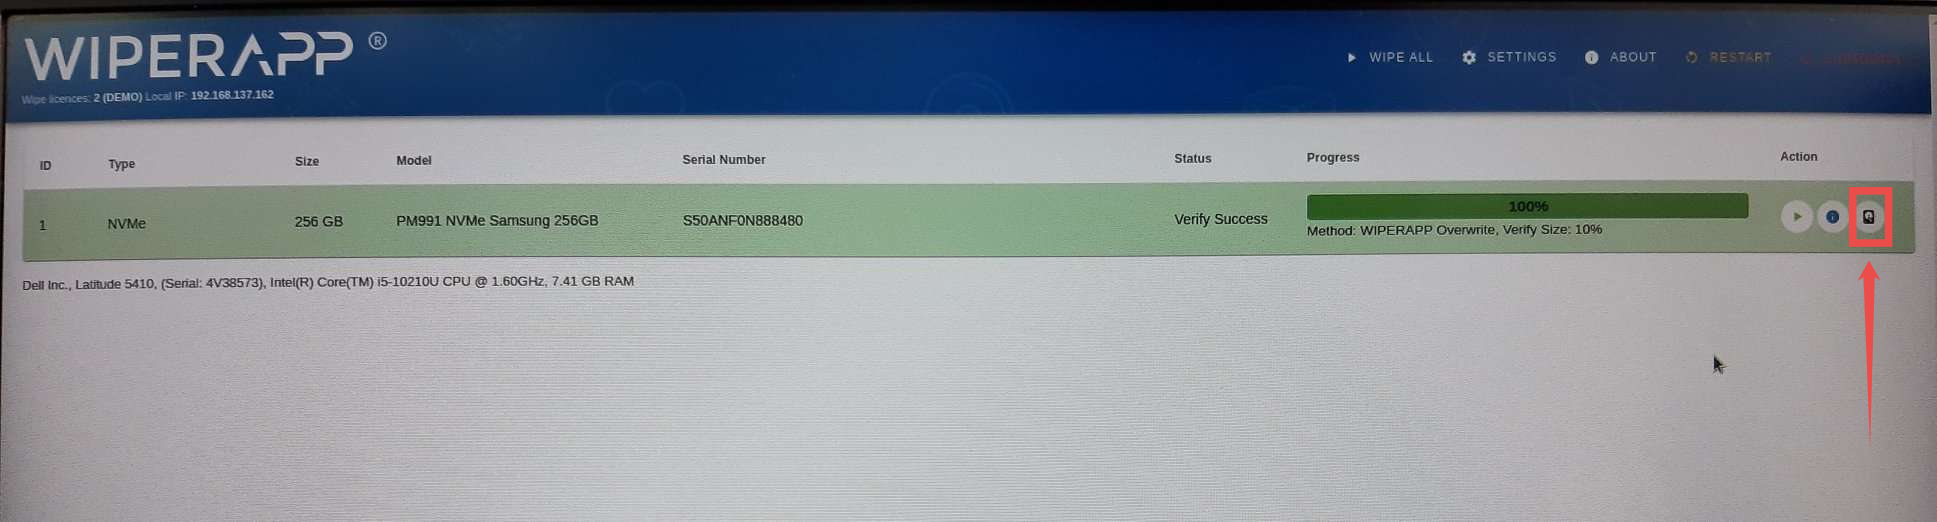
WIPERAPP automatically writes wiping confirmation into Sector ZERO (MBR). This serves as official proof of the data wipe, useful for compliance and verification purposes.
INFO: For more information on what Hex Viewer is and how to use it, refer to the Manage Drive Actions documentation.
After successfully performing the wiping operation, a detailed report is generated in the WIPERAPP Admin Panel. This report contains key information about the erasure process, including device details, wiping method, and verification results.
Ensure the generated report reflects accurate and complete details of the process. Refer to the Validating Report Correctness Documentation for step-by-step guidance on how to review and verify the report.