¶ Adding Token to Pendrive
After successfully creating the token, the next step is to add it to the WIPERAPP flash drive. The token serves as a key to authenticate your credentials and load the required configurations for secure data sanitization.
Without the token, WIPERAPP cannot proceed with the erasure process. This documentation provides clear, step-by-step instructions to ensure you add the token to your WIPERAPP flash drive seamlessly and effectively.
Let’s get started 🚀
¶ Flash Drive (Preferred)
This method requires manually placing the token file onto the WIPERAPP flash drive.
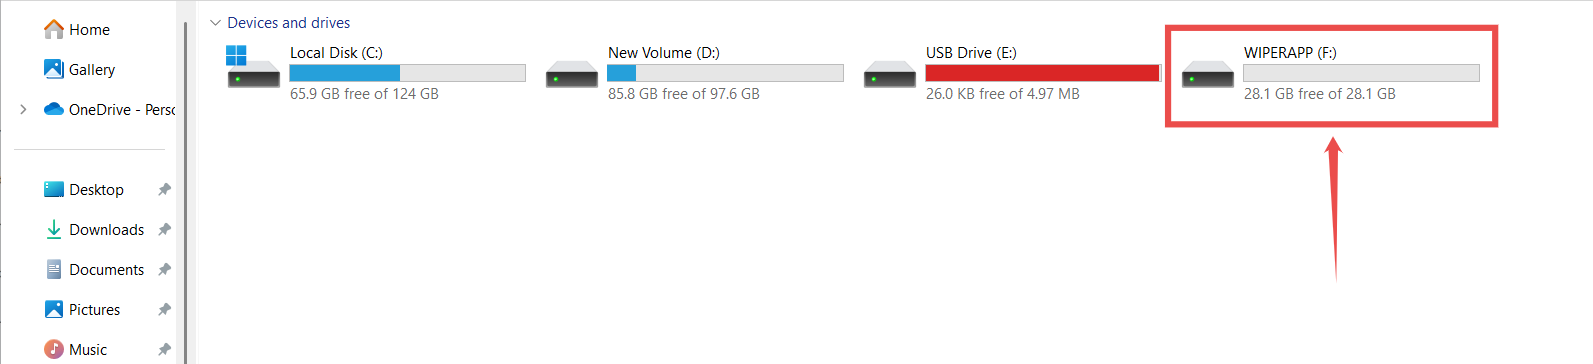
Step 1: Plug in the flash drive containing the WIPERAPP ISO into your local system. Once connected, the flash drive should display a WIPERAPP partition.
NOTE: You need to boot the WIPERAPP ISO for the first time to create this partition. After flashing the WIPERAPP ISO onto the USB, the WIPERAPP Partition will not be created yet. Plug the flash drive into any computer (even one you don’t want to wipe) and start the application. When the WIPERAPP screen appears, the partition will be created automatically. For detailed steps, refer to the Start WIPERAPP ISO Documentation.
If the system cannot detect this created partition after the first boot, refer to the Invisible WIPERAPP Partition documentation for a solution.
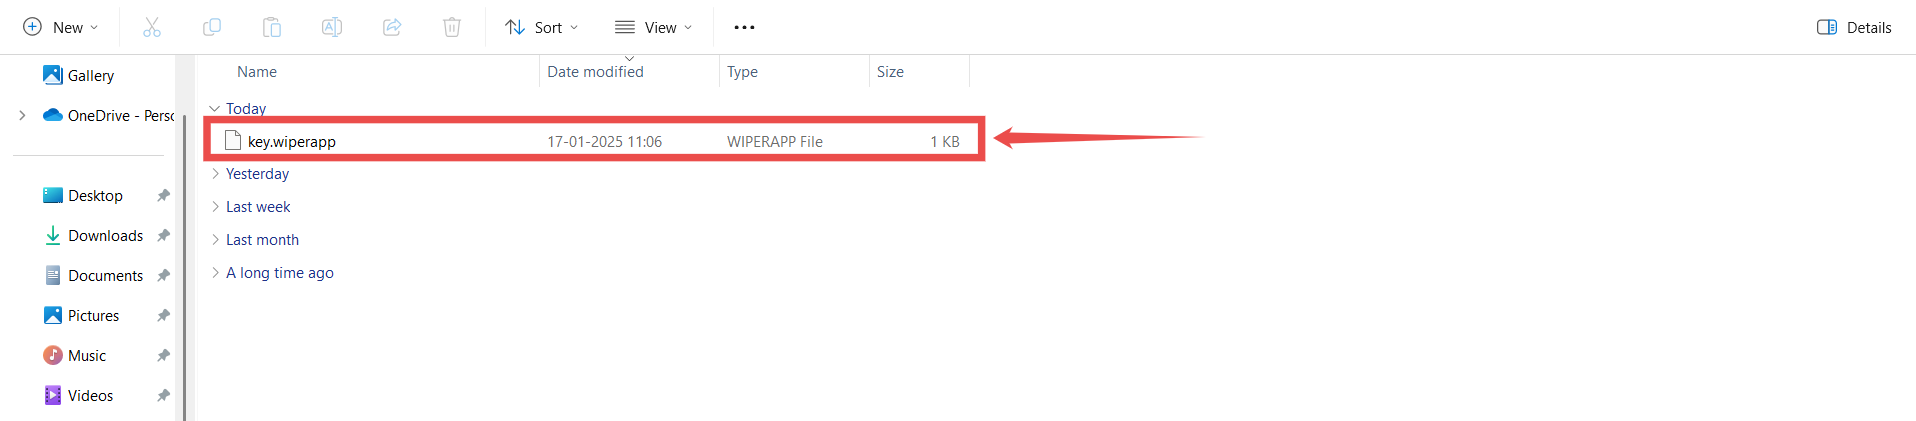
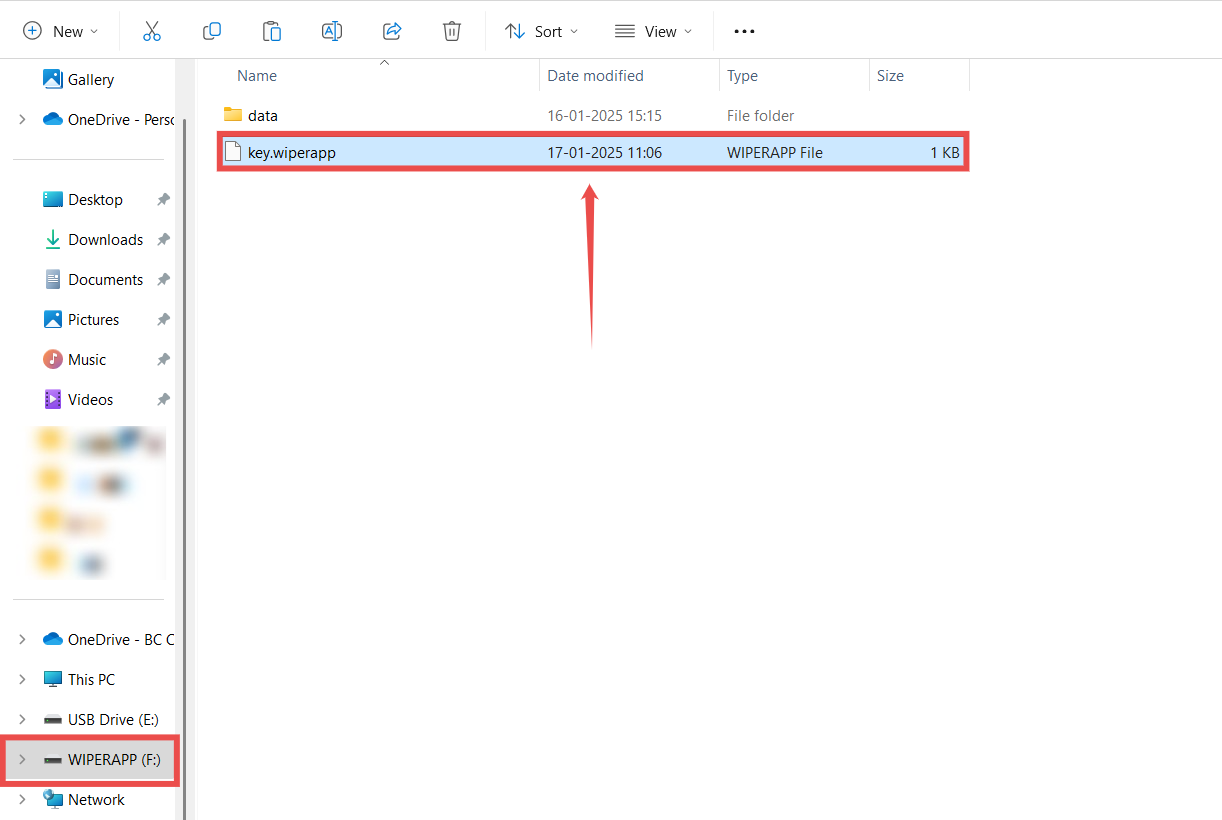
Step 2: Navigate to the directory where you securely stored the key.wiperapp file. Now, copy this file.
Step 3: After copying the key.wiperapp file, navigate back to the WIPERAPP partition as shown in the snippet below and open it.

Step 4: Open the wiperapp folder within this partition drive.
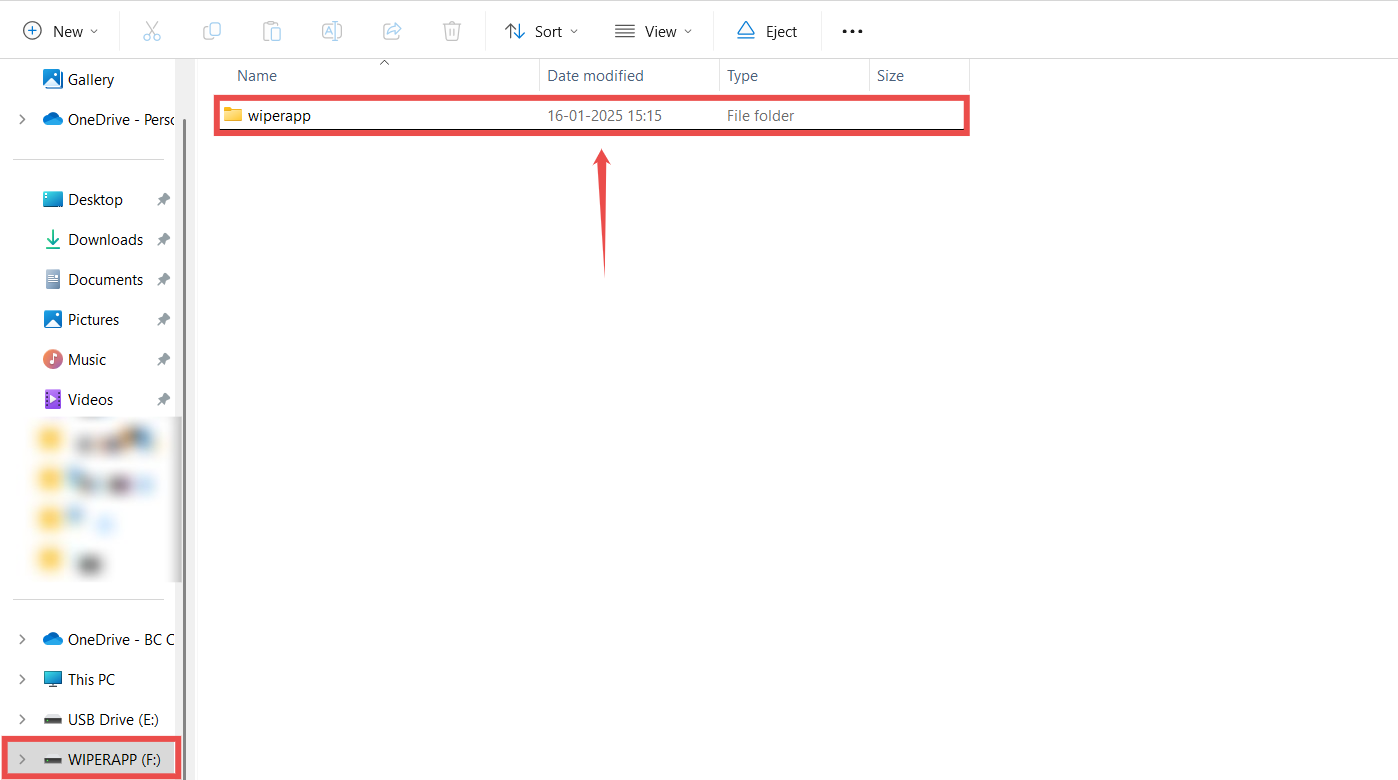
Step 5: Paste the key.wiperapp file (you previously copied) into this wiperapp folder. Then, safely eject the flash drive from your local system.
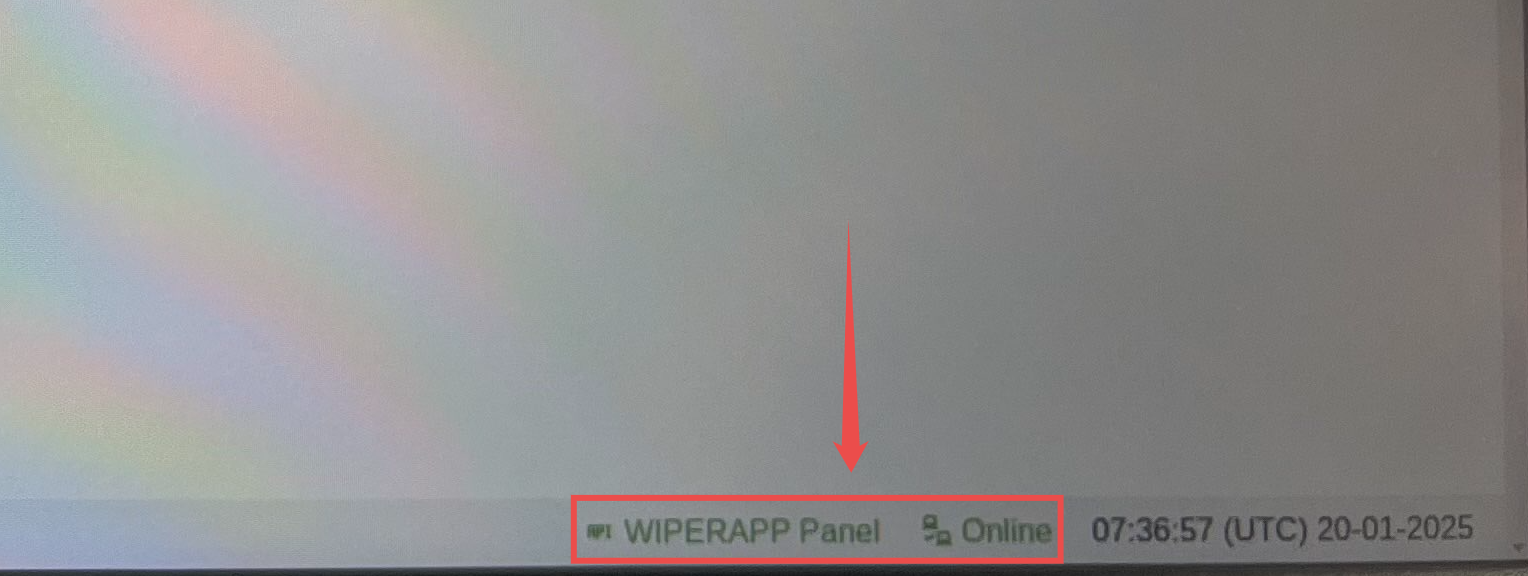
Step 6: Insert the WIPERAPP flash drive into the computer system where you want to wipe the drives, then start the WIPERAPP application. After successfully loading the WIPERAPP application, wait for the internet connectivity status to change from Offline to Online. This process usually takes a few seconds.
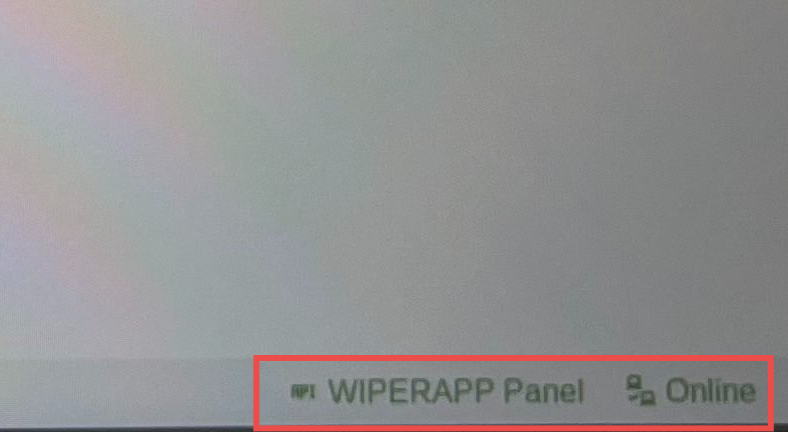
NOTE: Once the system is online, the WIPERAPP Panel color will also immediately change to green, indicating that the token has been successfully added.
WARNING: If the internet connectivity status remains offline after launching the WIPERAPP ISO interface, it might be because you are not connected to the internet through a wired connection. WIPERAPP operates on wired connections, as Wi-Fi is typically not supported in the ISO environment.
Ensure the system is connected using either an Ethernet cable or USB tethering via a mobile phone. A stable wired connection is essential for changing the status from offline to online and ensuring seamless operations.
After successfully adding the token to the WIPERAPP flash drive, you should understand how the WIPERAPP Client Interface works before you start wiping. For more information, refer to the Client Control Panel documentation.
¶ QR Code & Camera
This method lets you upload the token directly to the WIPERAPP at launch by scanning a QR code. After successfully starting the WIPERAPP
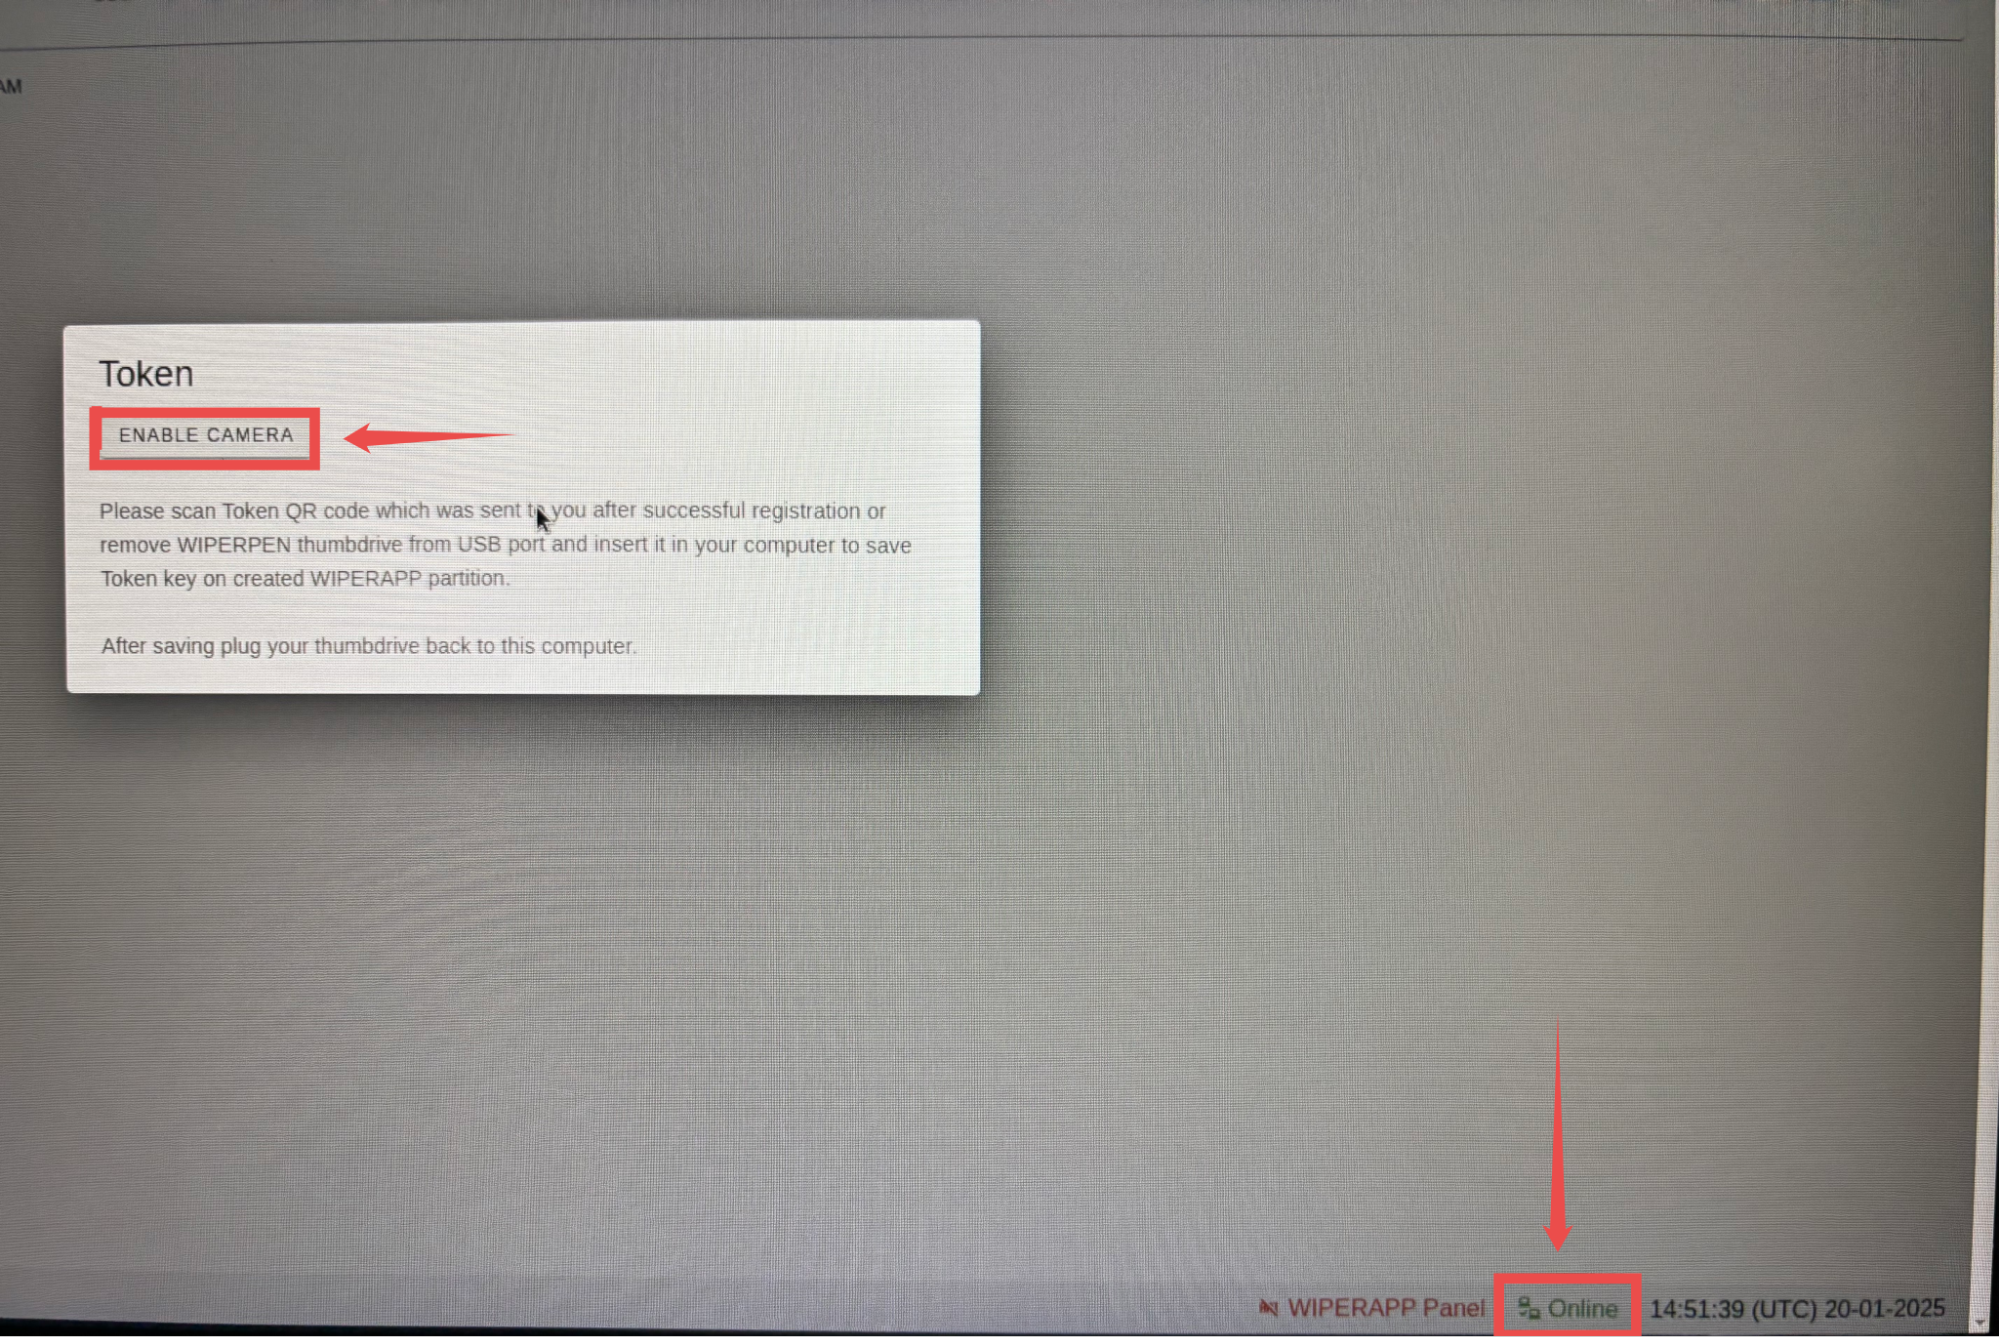
interface, wait for the internet connectivity status to change from Offline to Online. Once it changes to Online, you will be prompted to enable the camera.
WARNING: If the internet connectivity status remains offline after launching the WIPERAPP ISO interface, it might be because you are not connected to the internet through a wired connection. WIPERAPP operates on wired connections, as Wi-Fi is typically not supported in the ISO environment.
Ensure the system is connected using either an Ethernet cable or USB tethering via a mobile phone. A stable wired connection is essential for changing the status from offline to online and ensuring seamless operations.
Step 1: Click on the ENABLE CAMERA button to proceed.
NOTE: The camera prompt will not appear if the key.wiperapp file is saved on the WIPERAPP flash drive. In this situation, you can proceed using the preferred Flash Drive method.
Step 2: Scan the token QR code you received in the email after successfully creating the token from your mobile device.

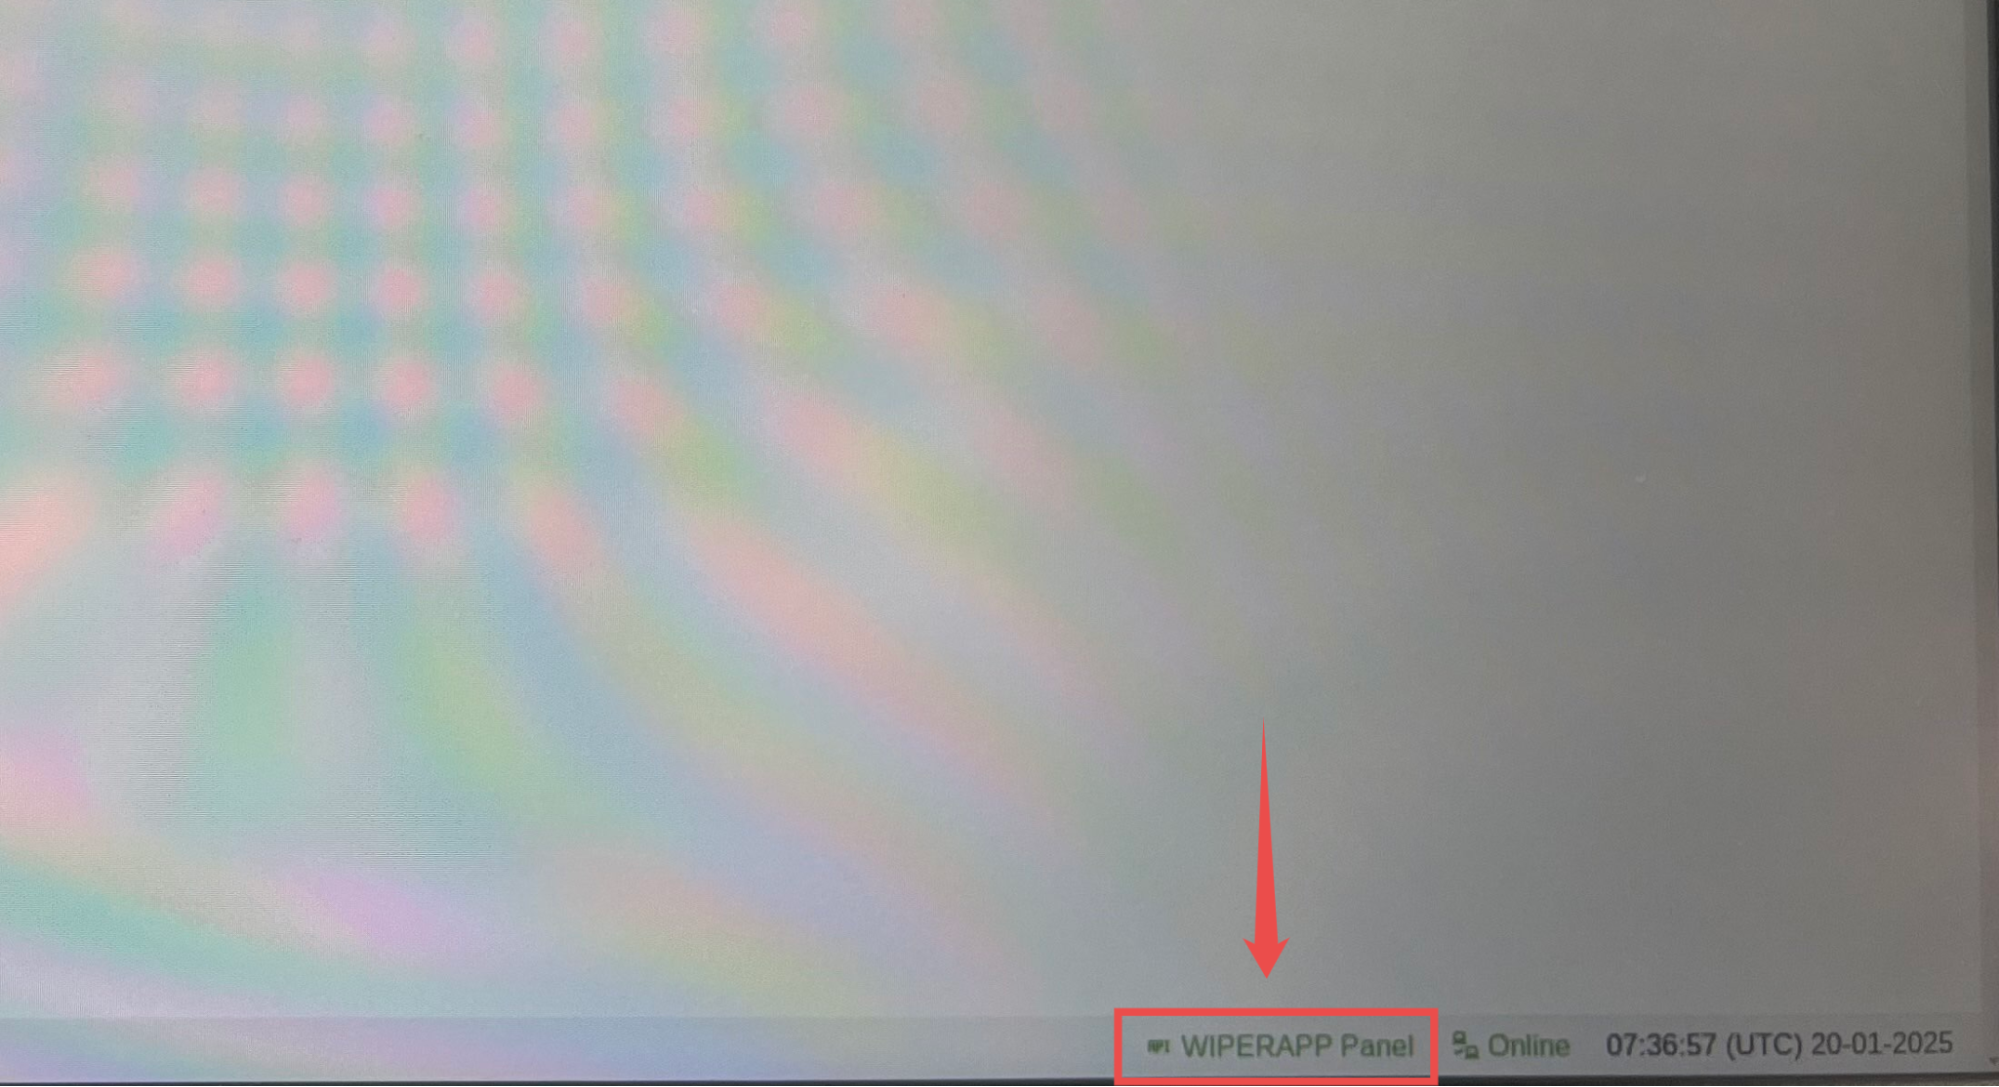
Once you successfully scan the token QR code, the WIPERAPP Panel will turn green, indicating that the token has been successfully added.
After successfully scanning the token QR code, you should understand how the WIPERAPP Client Interface works before you start wiping. For more information, refer to the Client Control Panel documentation.
¶ Automatic Token Recognition and Panel Status Update
When you insert the pendrive into the computer where you want to erase the disk, the WIPERAPP application will automatically detect the Token if it is already running. If the application initially displays the WIPERAPP Panel icon in red color, it should change to green upon finding the Token. There’s no need to reset the application manually.
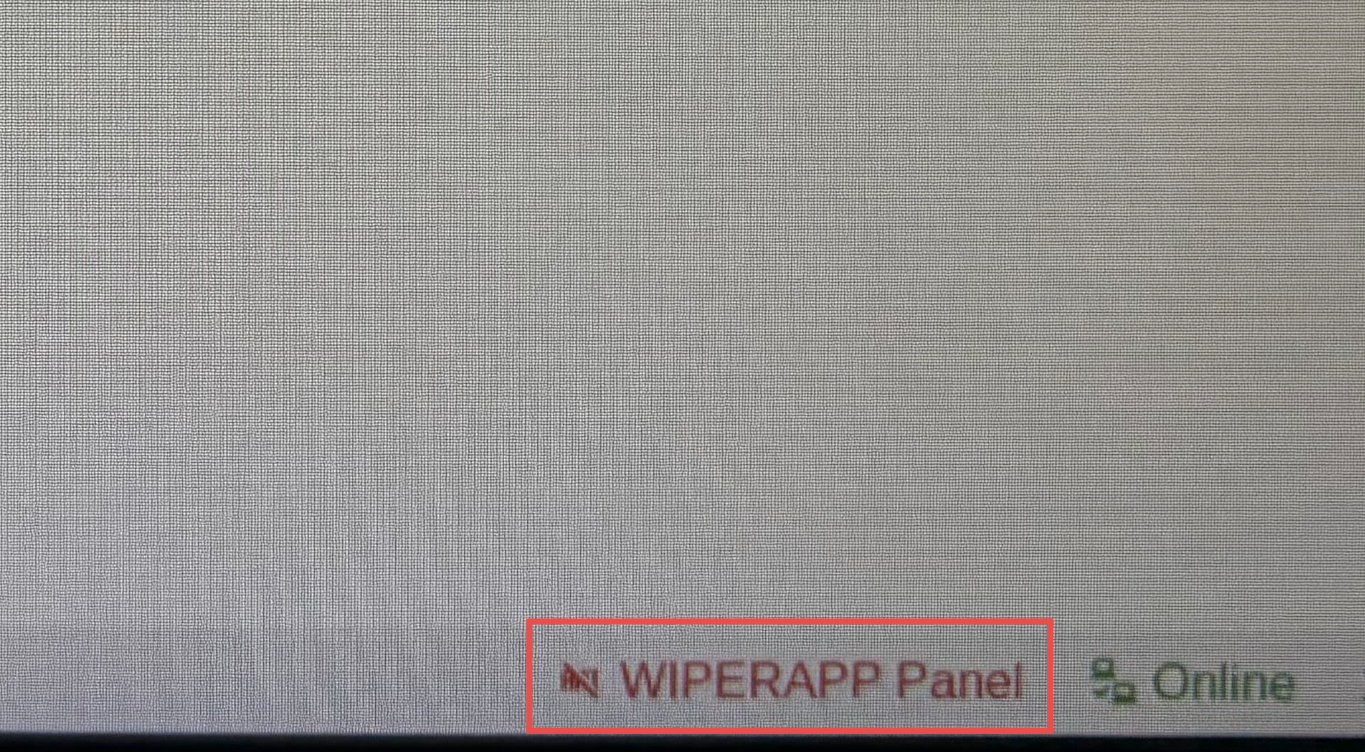
¶ Initial Status Before Token Recognition
The WIPERAPP Panel icon will be displayed in red color, indicating that the token has not yet been recognized.
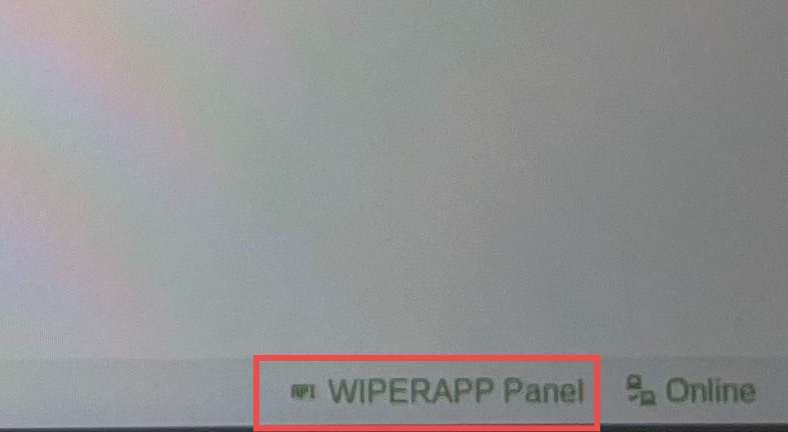
Token Recognition
Once the application detects the token in the flash drive, the WIPERAPP Panel icon color will automatically change to green. This update confirms that the token is successfully recognized, and the application is now authenticated and ready for data wiping.
NOTE: Additionally, if you reboot the computer, the application will launch with both icons displayed as green, ensuring that everything is set up and ready to go.
¶ Reboot Verification
If the computer is rebooted, the WIPERAPP application will launch again, and the WIPERAPP Panel and internet connectivity status will both show in green color, confirming that the token remains active and ready for operations.