¶ Validating Report Correctness
After completing a data wiping operation, it's crucial to verify the authenticity and accuracy of the generated Certificate of Sanitization (Report). This step ensures compliance with data sanitization standards and provides confidence that the data erasure process was executed correctly. This documentation offers a step-by-step guide to validating the reports and confirming their authenticity.
Let’s get started 🚀
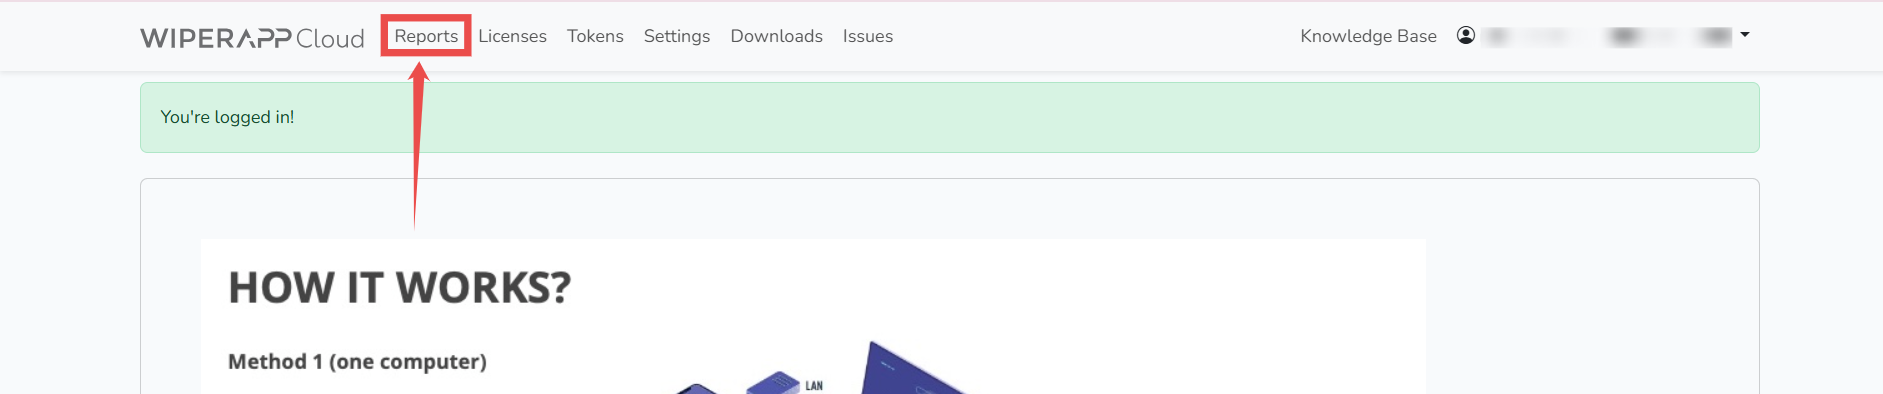
Step 1: Navigate to the Reports section in the WIPERAPP Admin Panel.
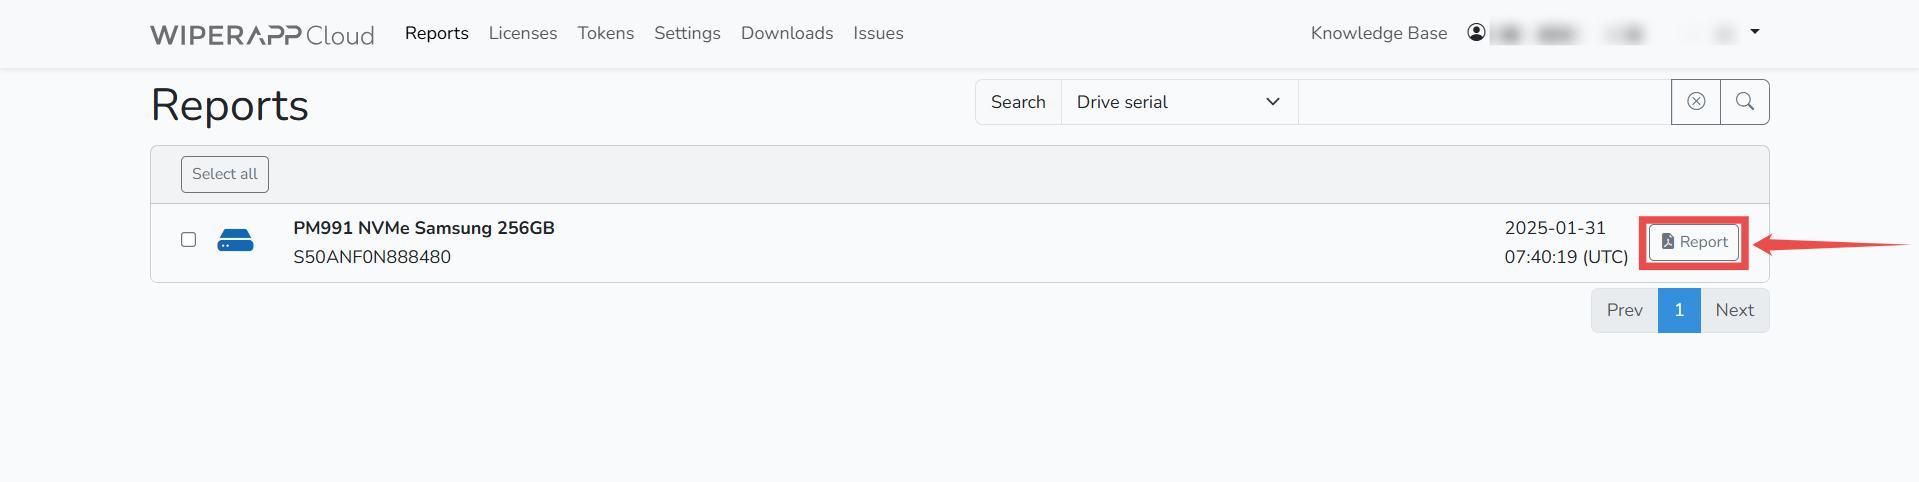
Step 2: Click the corresponding Report button for the report you want to verify.
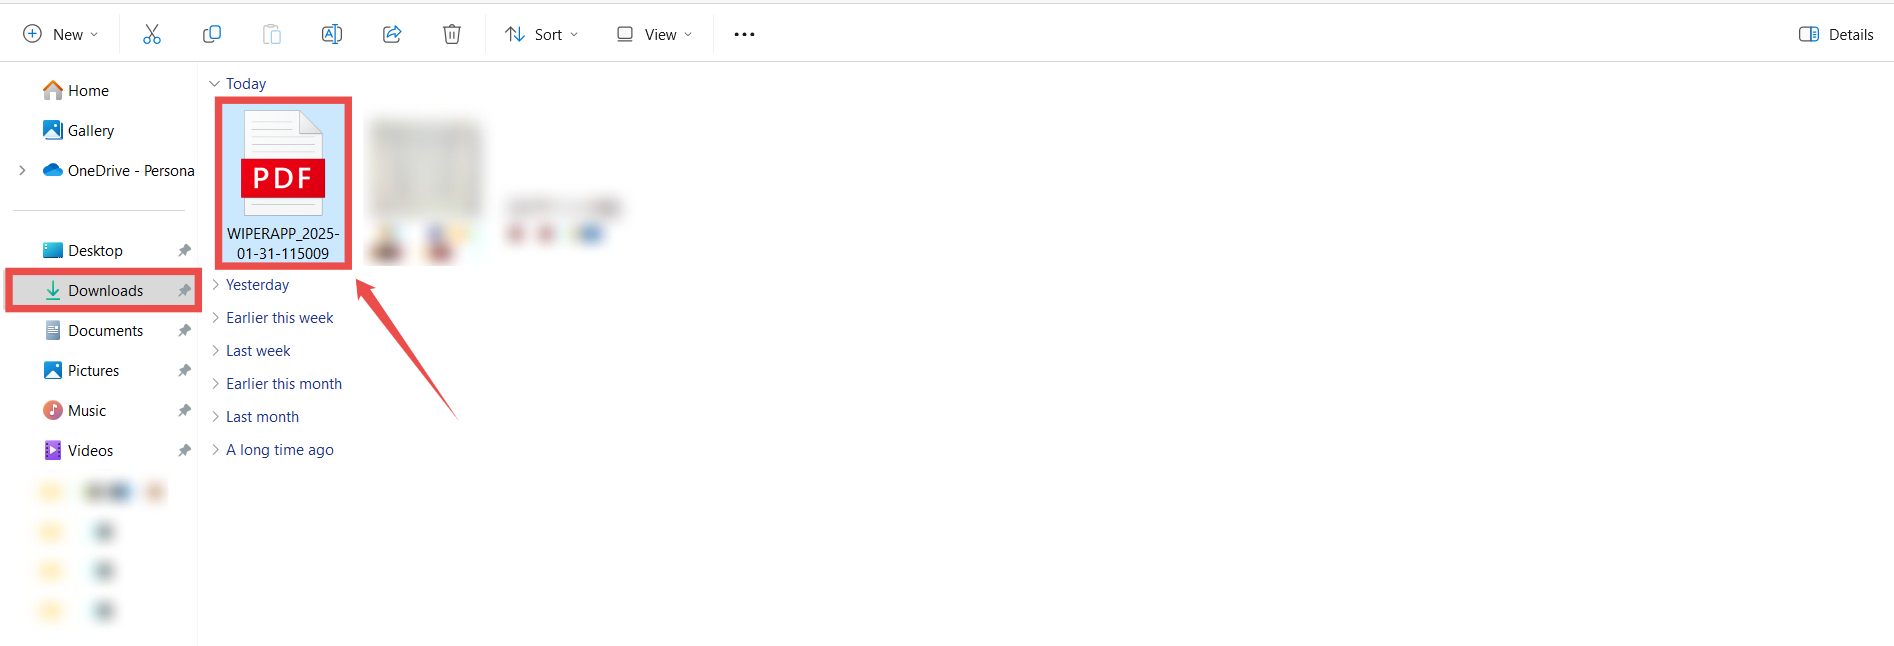
Step 3: The report will be downloaded in PDF format. Navigate to the downloads section on your system and open the report.
Step 4: Scan the QR code with your mobile camera, and it will direct you to a verification page.
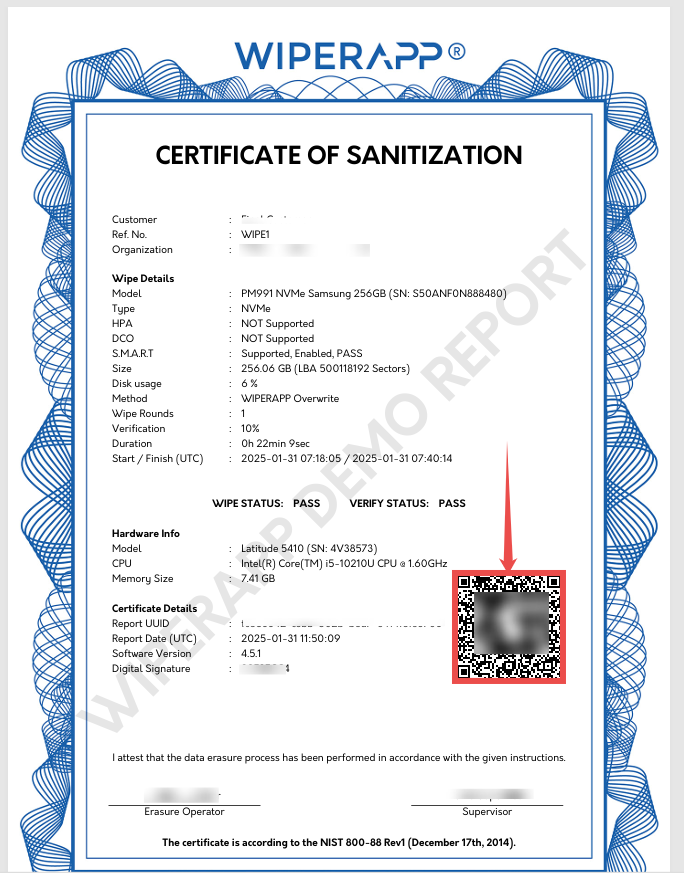
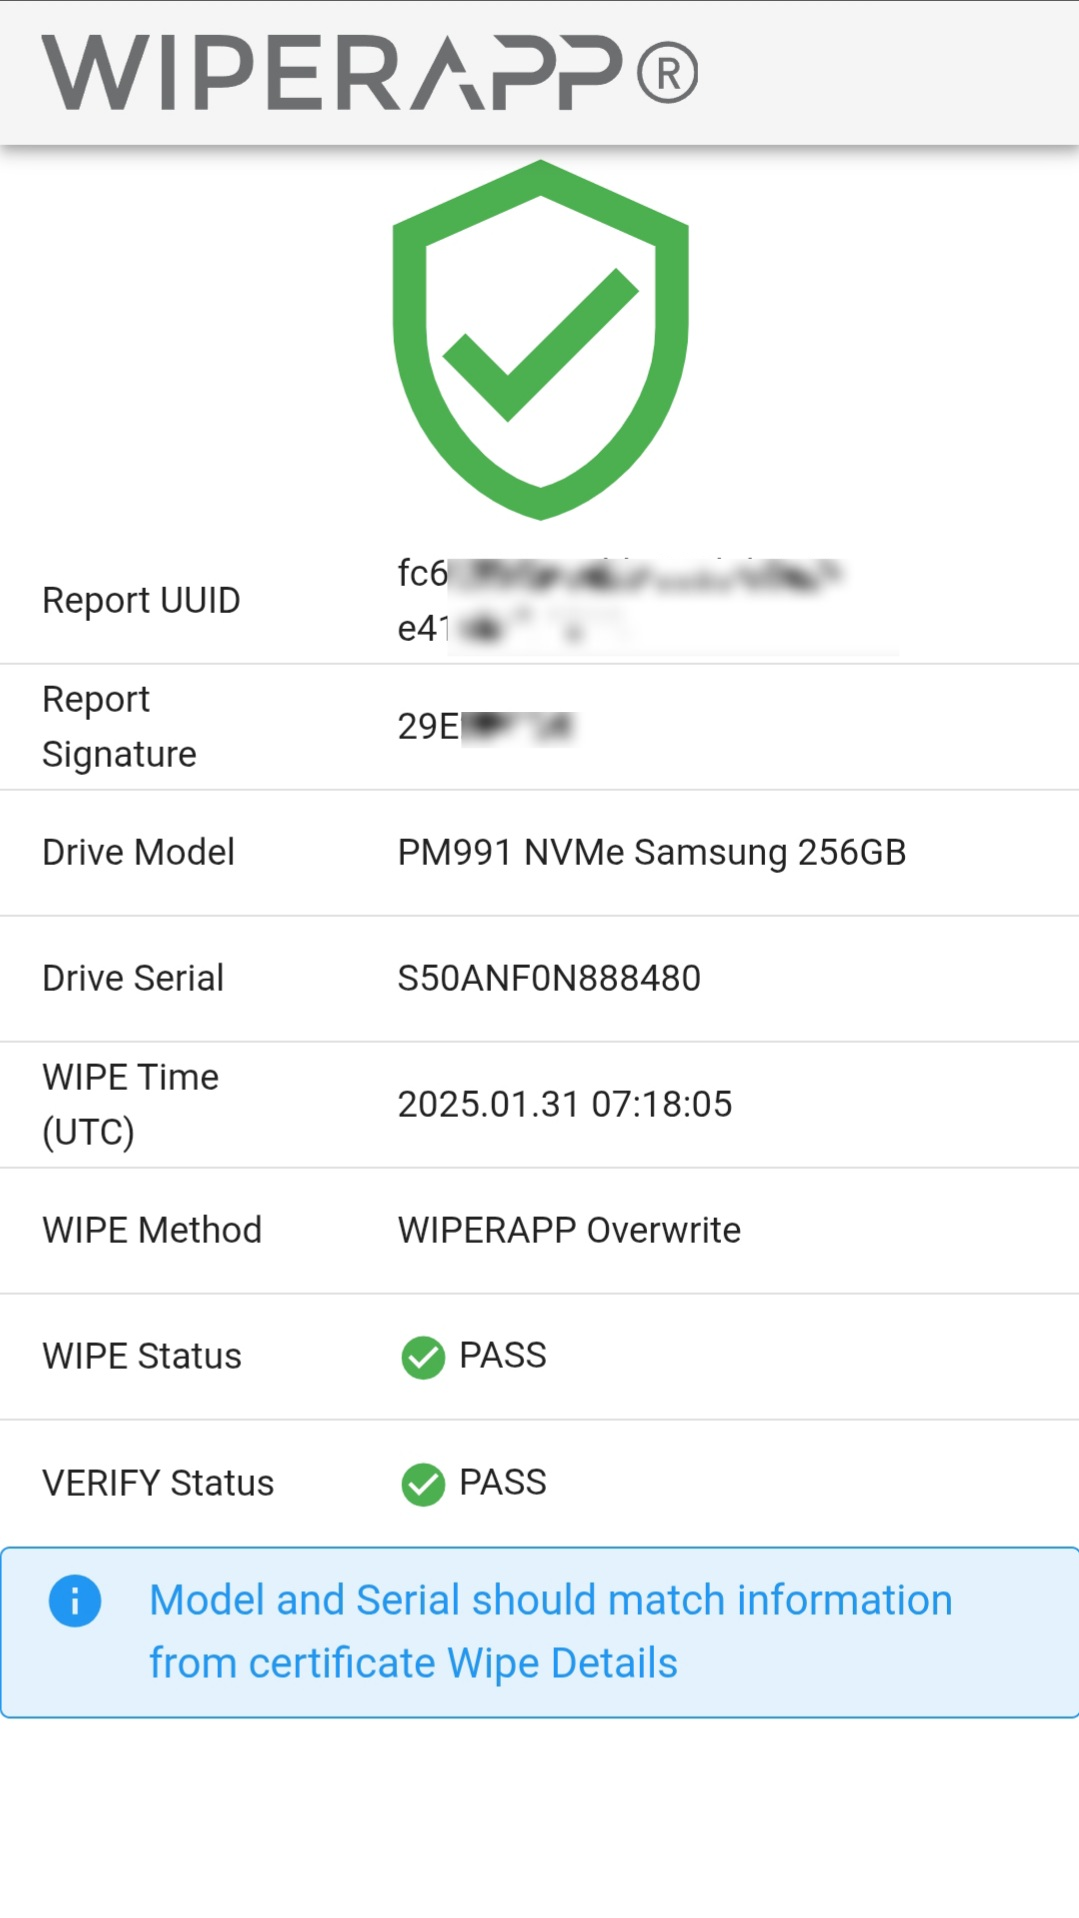
The verification page shows key details of the completed wiping operation. Review the information below to confirm the report's accuracy and authenticity:
| Field | Description |
| Report UUID | A unique identifier for the generated report. Ensure it matches the UUID in your records. |
| Report Signature | A cryptographic signature verifying the integrity of the report. Ensures it hasn’t been altered or tampered with. |
| Drive Model | Verify the drive model matches the details from the wiping operation. |
| Drive Serial Number | Verify the drive serial number matches the details from the wiping operation. |
| WIPE Time (UTC) | Confirm the timestamp of when the wipe process was executed. |
| WIPE Method | Verify that the correct wiping method or standard was applied. |
| WIPE Status | Indicates if the wiping operation was successful. Ensure this is marked as PASS. |
| VERIFY Status | Indicates if the verification process was successful. Ensure this is marked as PASS. |
To learn more, visit the Home and explore other WIPERAPP guides.