If WIPERAPP is not detecting your connected drives, the issue may be related to system-level recognition. Before troubleshooting within WIPERAPP, ensure that your system recognizes the drives at the hardware level. Below are two key steps to resolve this issue:
¶ Confirm Drive Recognition in BIOS/UEFI
Before WIPERAPP can detect your drives, they must be recognized at the hardware level. Restart your computer and access the BIOS/UEFI settings by pressing the designated key during startup, such as F2, F10, F12, Del, or Esc, depending on your system manufacturer. Once inside BIOS, navigate to the Storage Configuration or Boot Order section and check if the connected drive appears in the detected hardware list.
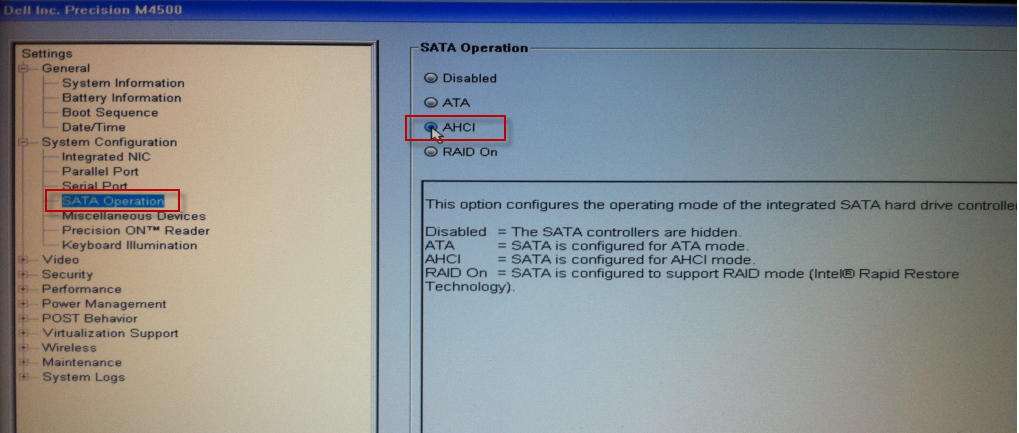
It is necessary to check and configure the following in BIOS settings:
- In System Configuration, change SATA operation to AHCI or ATA mode.
- Disable RAID Mode if it is enabled.
If the drive is detected in BIOS but still does not appear in WIPERAPP, proceed to the next step.
¶ Assign or Change Drive Letters (Windows Only, Before Booting WIPERAPP)
If the drive is missing from WIPERAPP but is visible in Windows, it may lack an assigned drive letter. To resolve this, open Disk Management in Windows by pressing Windows + X and selecting Disk Management from the menu. Locate the connected drive in the list; if it does not have a letter assigned, right-click on it and select Change Drive Letter and Paths. Assign an available drive letter and confirm the changes. Once done, restart your system and boot into WIPERAPP again to check if the drive is now detected.