¶ Configuration of Android Device (Sony)
To wipe data securely from a Sony device, certain configurations must be applied to ensure smooth operation with WIPERAPP. This includes enabling developer options, turning on USB debugging, and confirming essential device settings.
This documentation will walk you through each step needed to prepare your Sony device for the data erasure process.
Let’s get started 🚀
Step 1: Power on the device if it is switched off.
Step 2: Unlock the device with your current screen lock method.
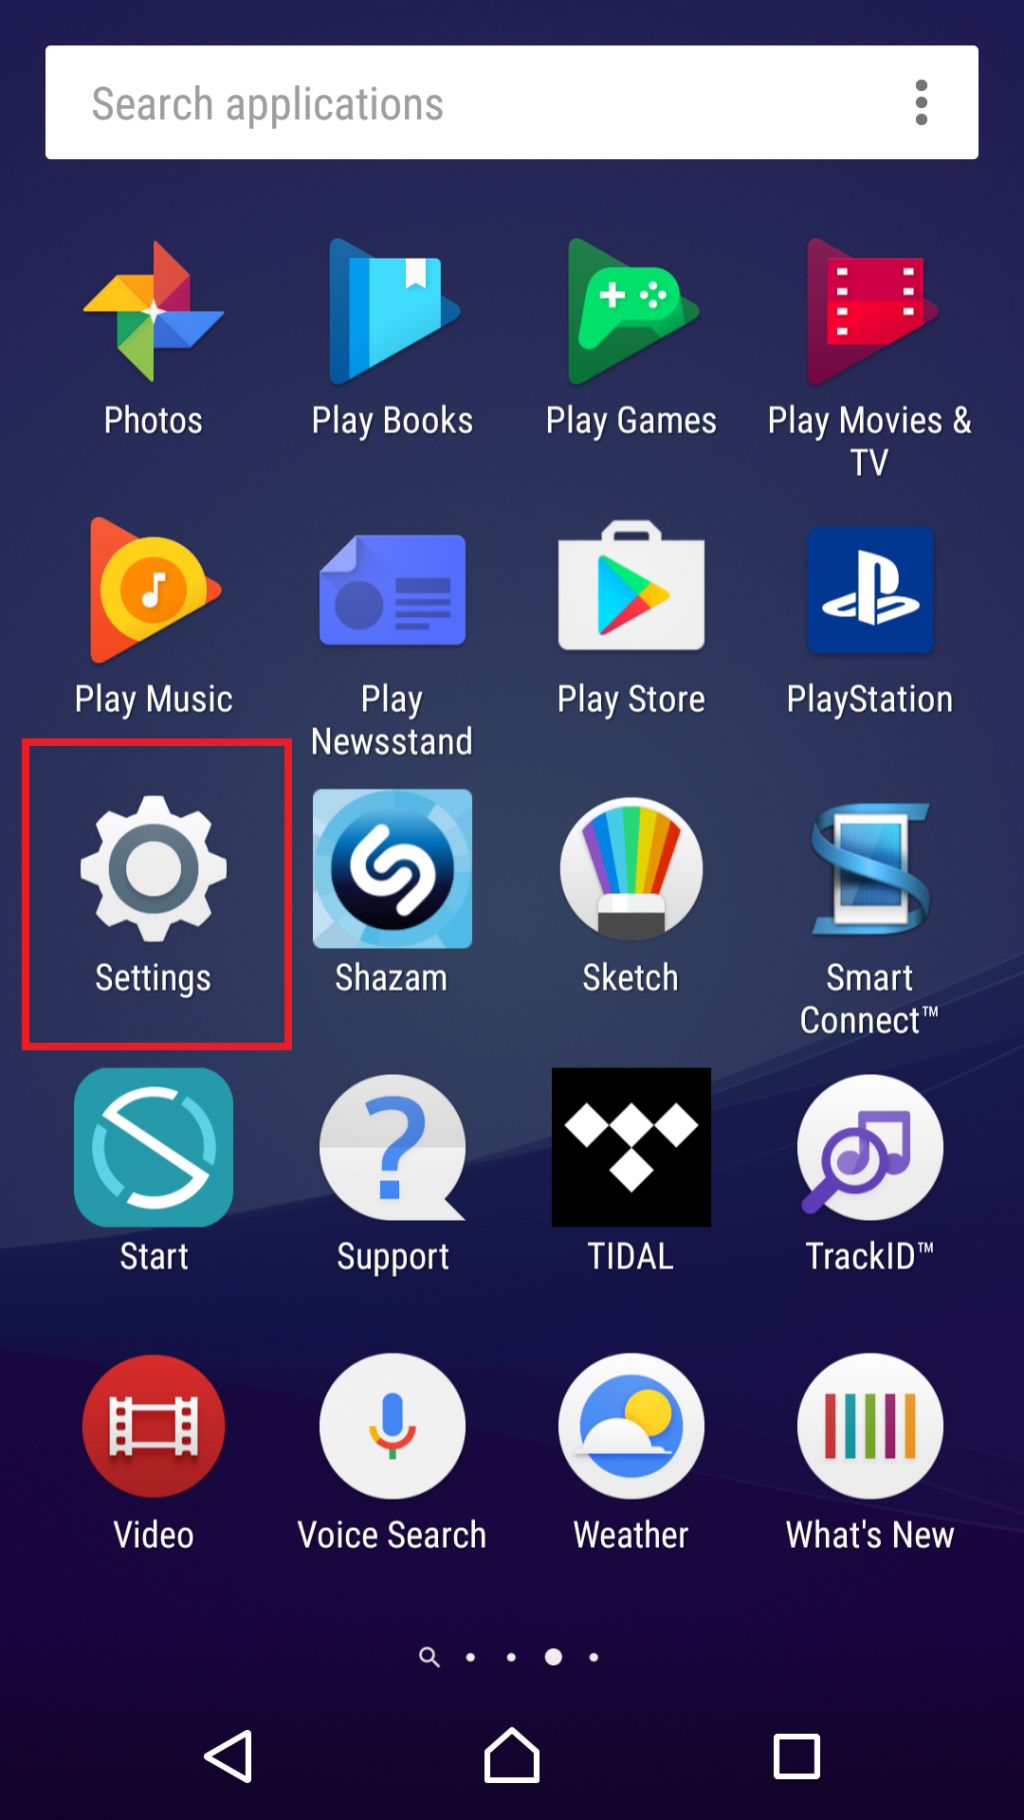
Step 3: Open the Settings from the main menu.
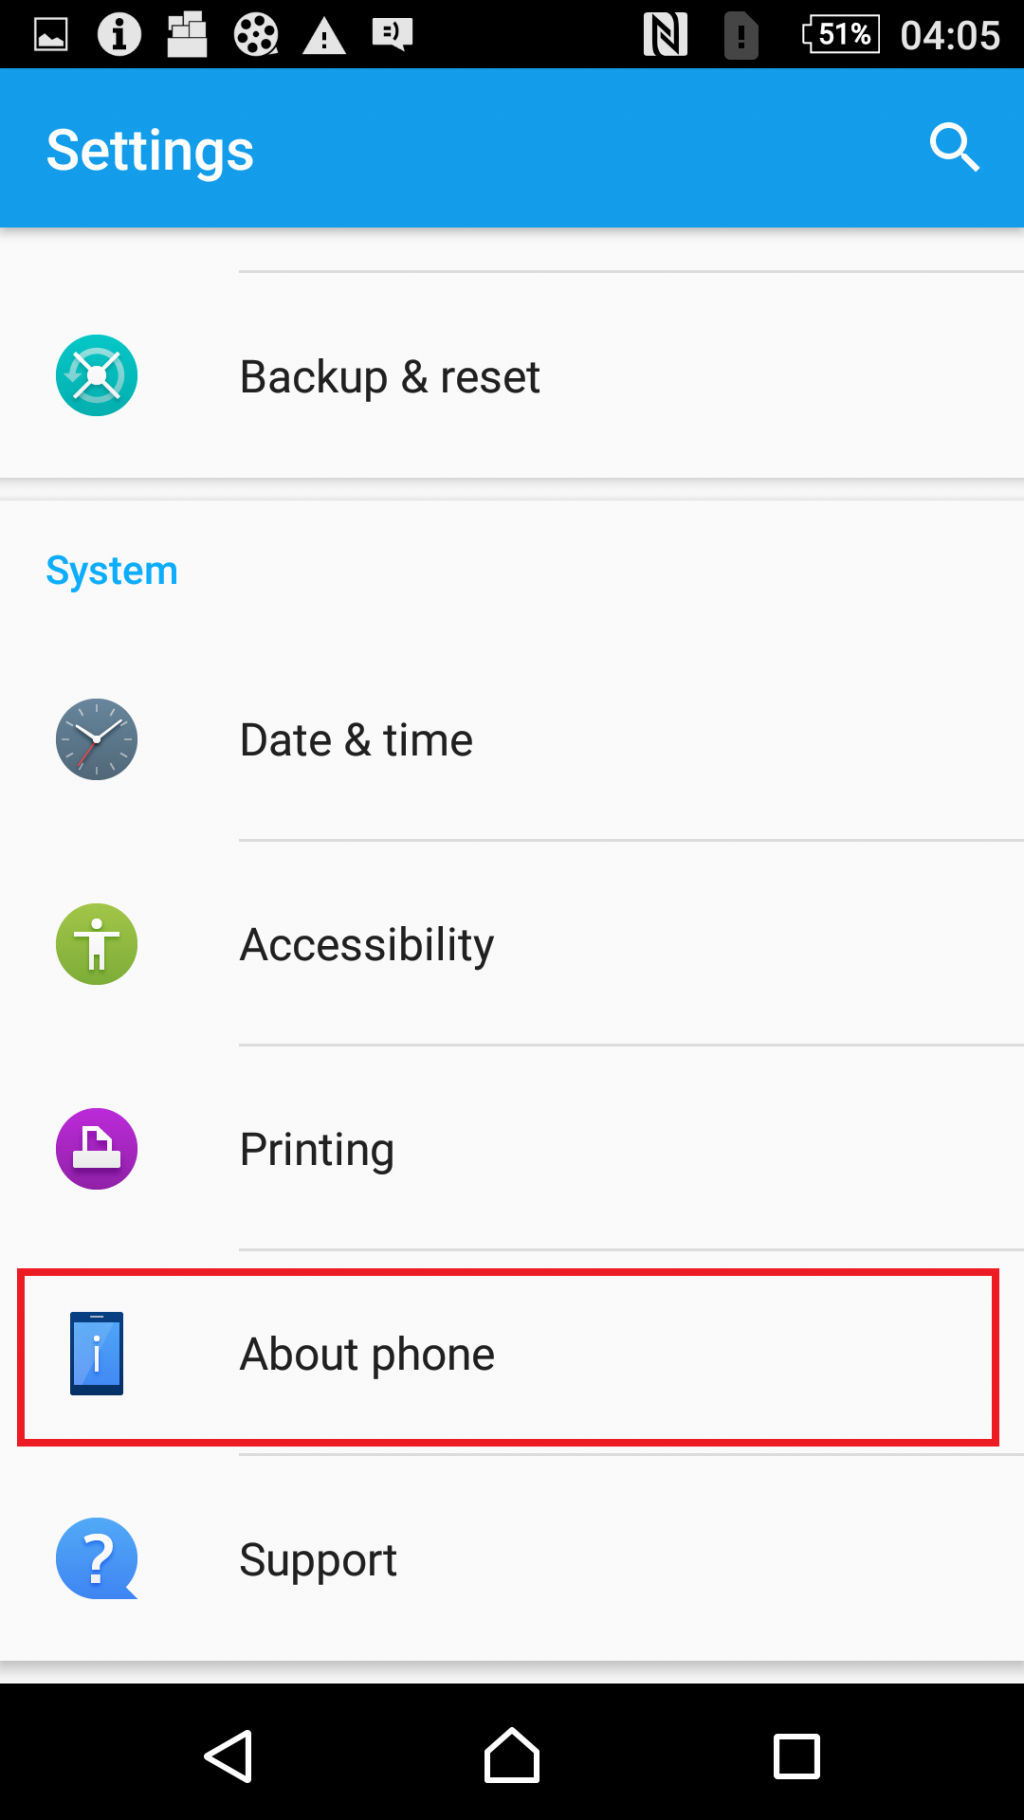
Step 4: Locate the About phone option and click on it.
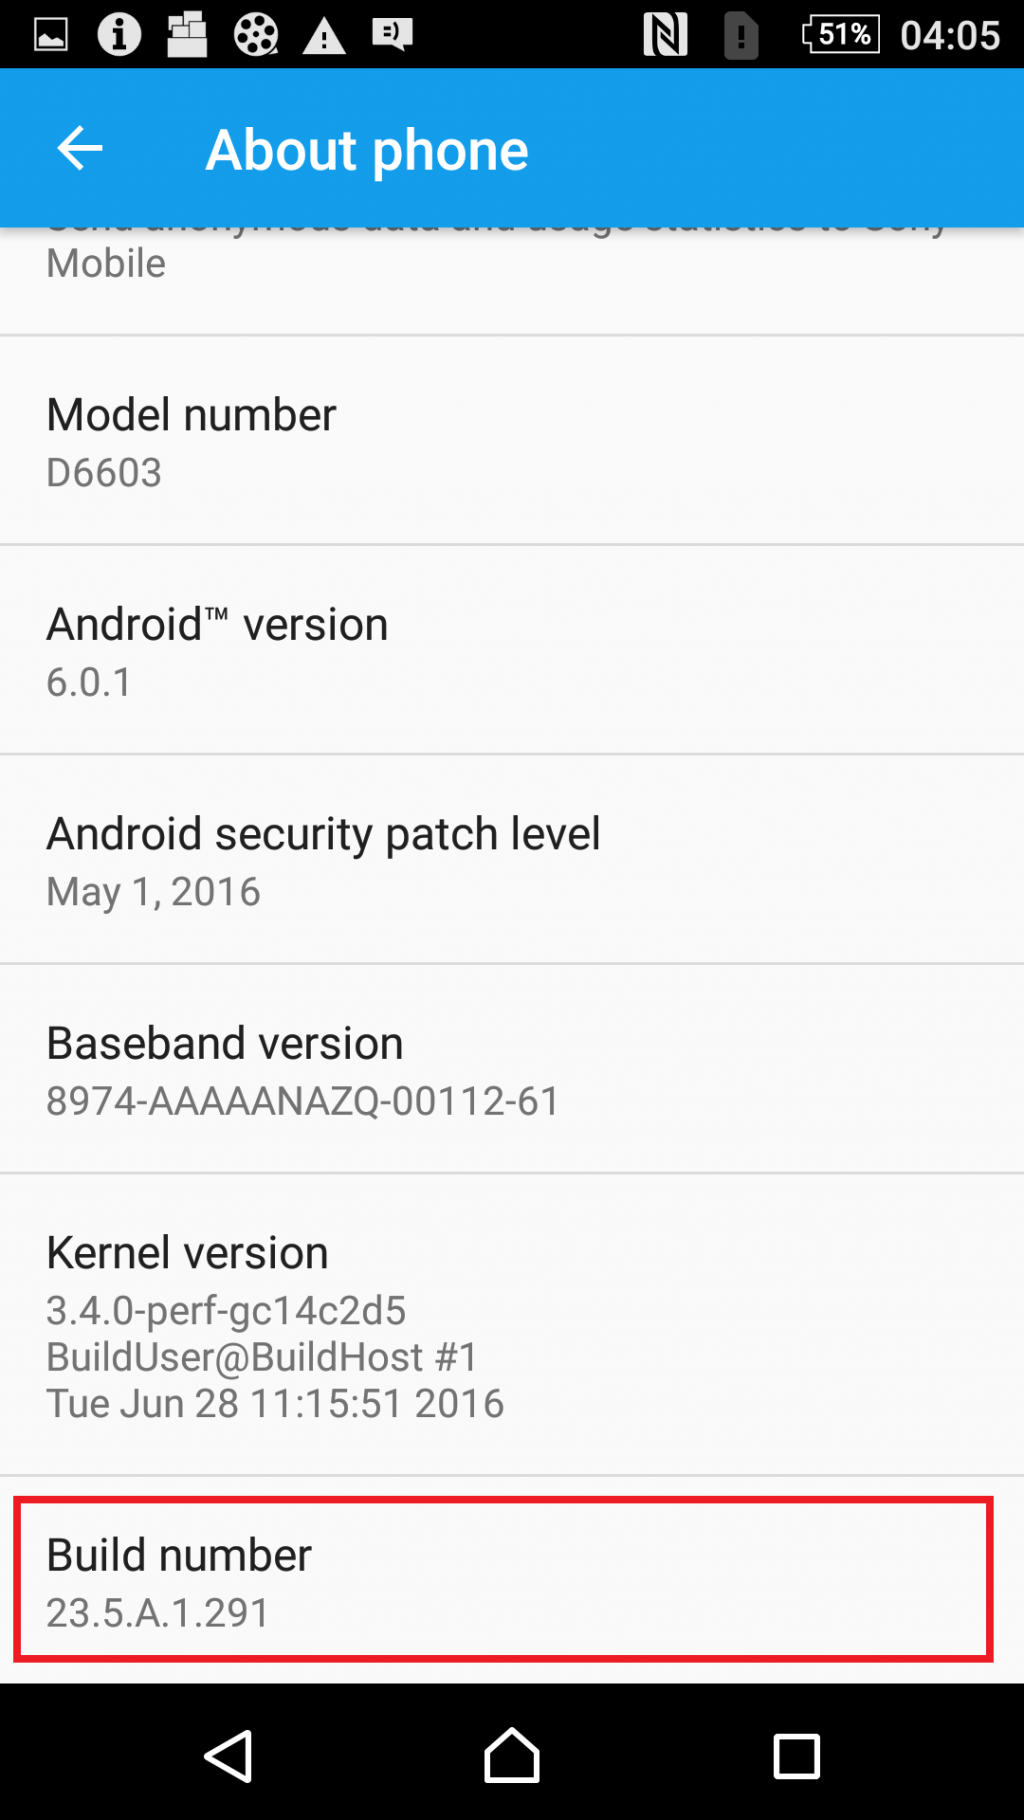
Step 5: Find the Build number option and tap on it five or more times to activate the Developer options.
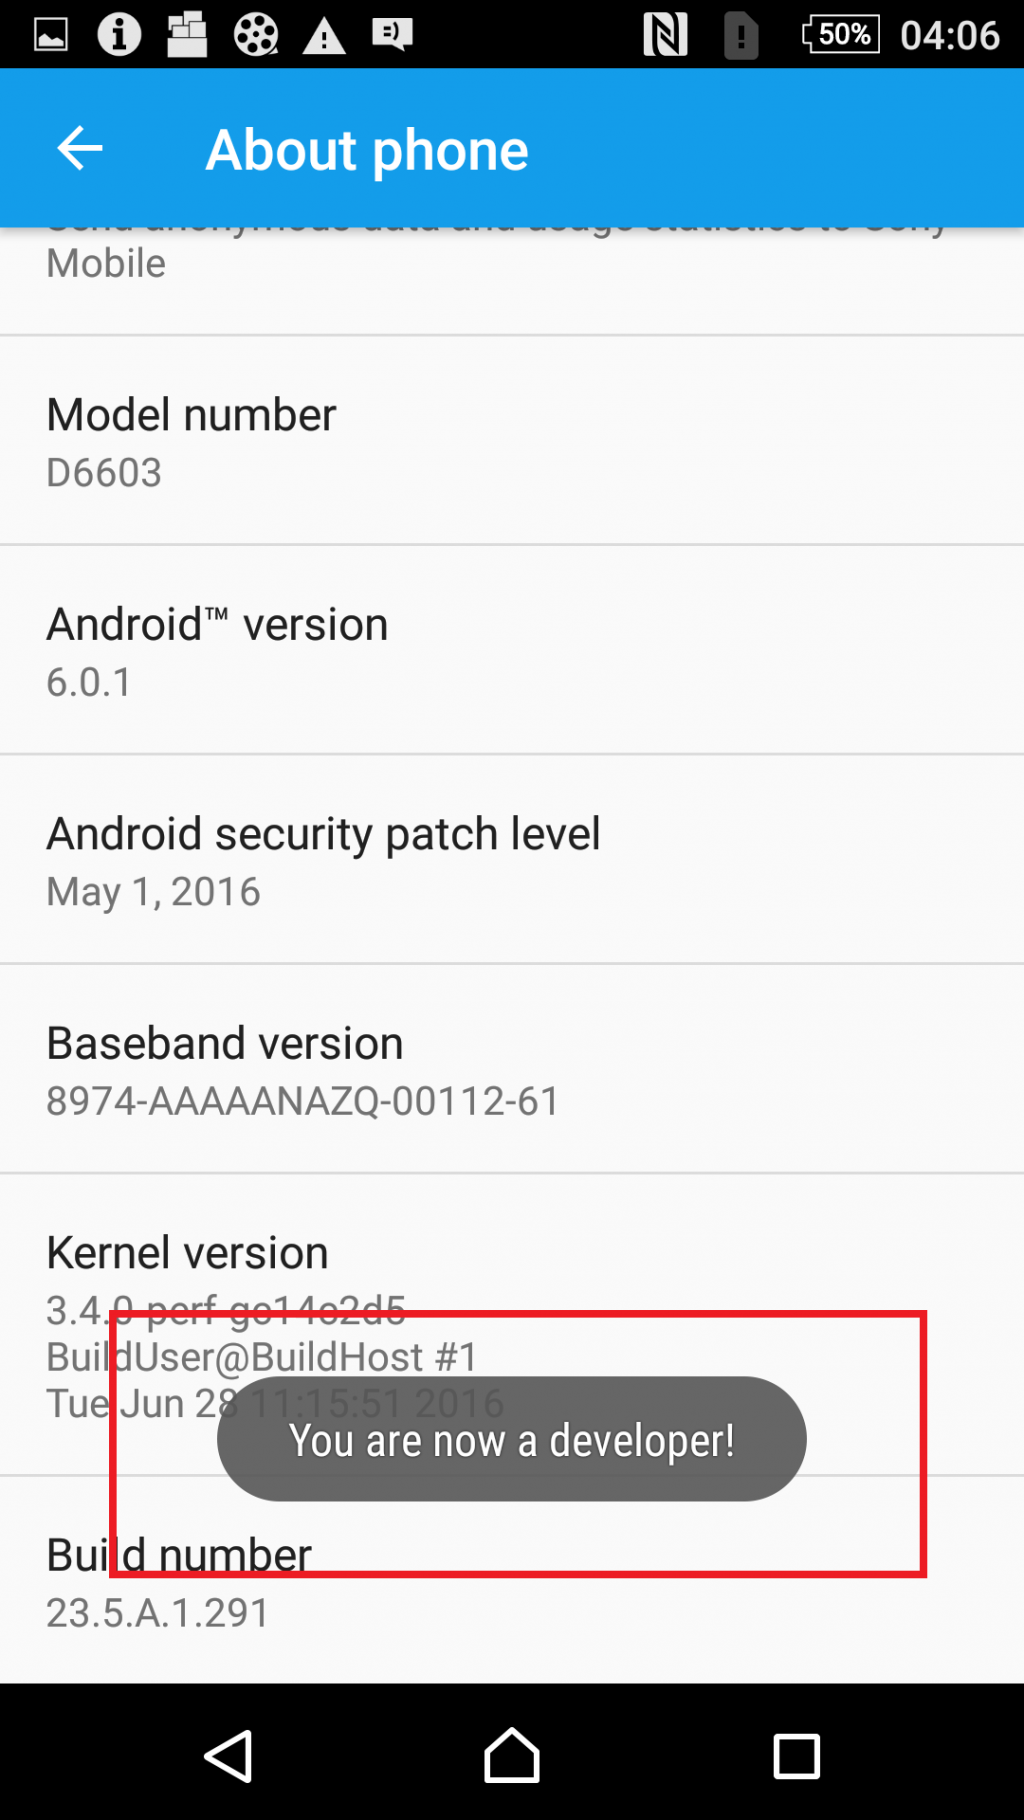
Once you successfully complete step 5, the message You are now a developer! will appear, indicating that the Developer options have been activated.
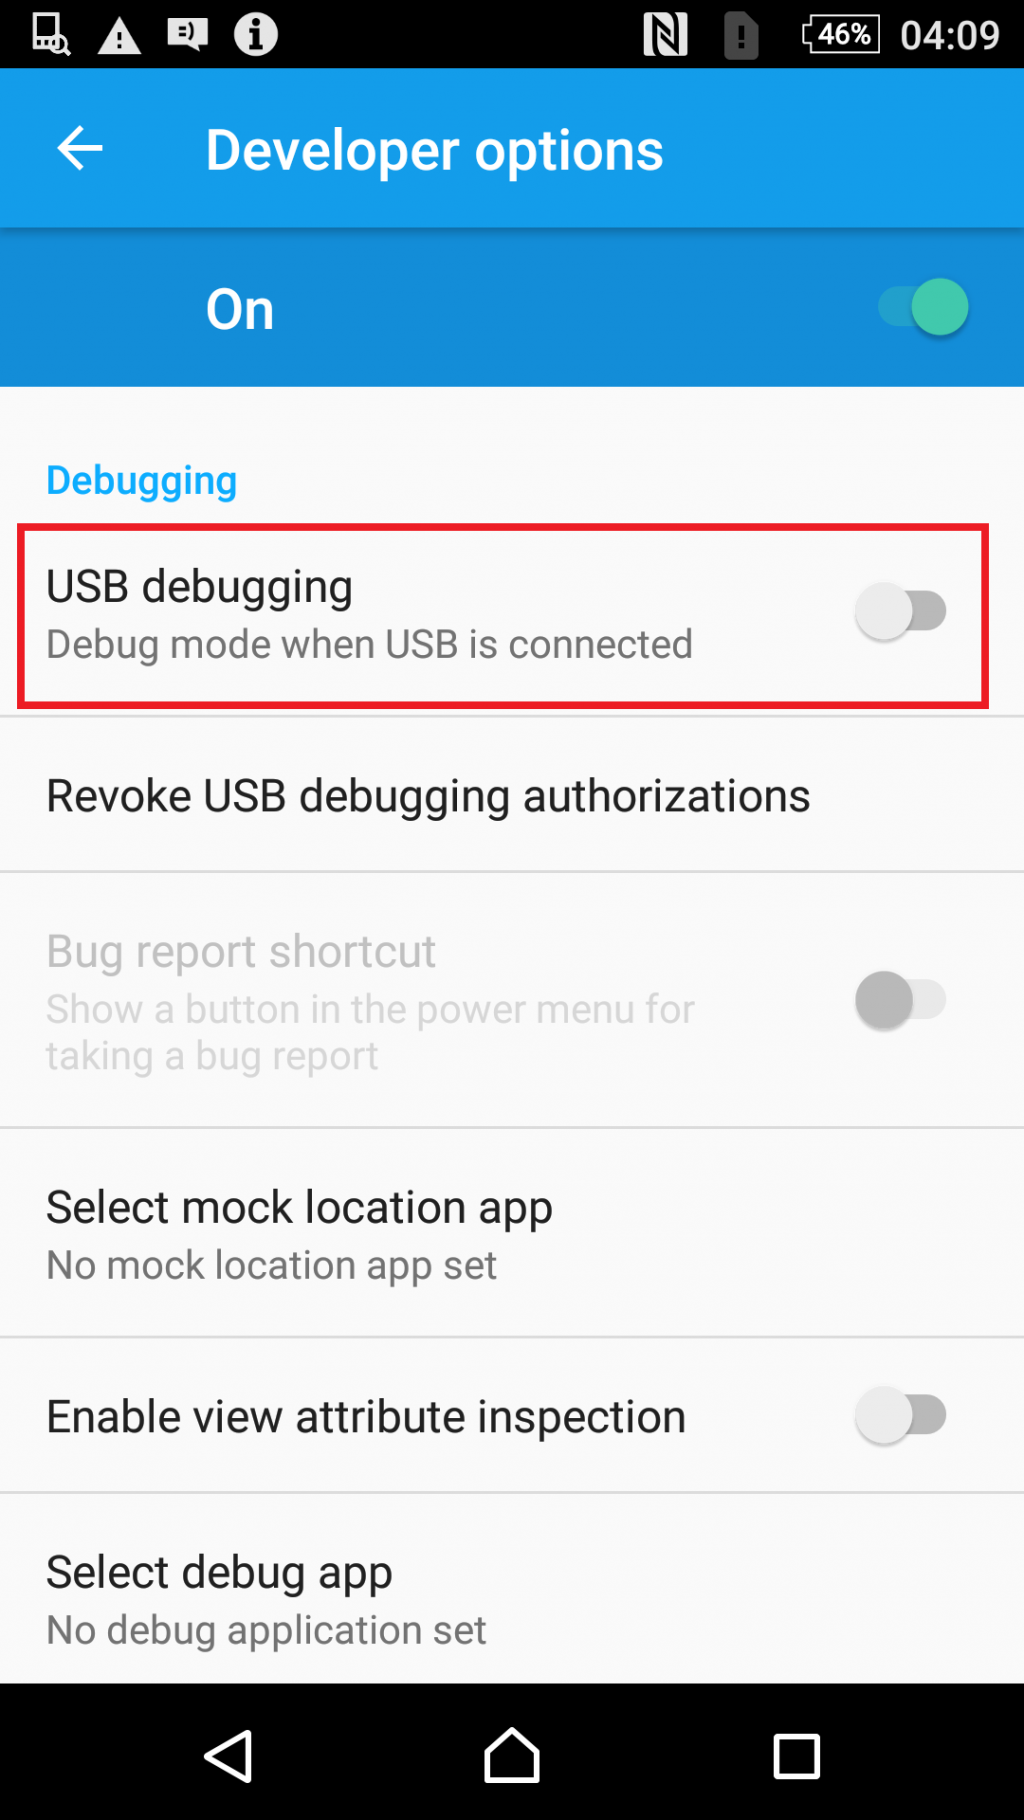
Step 6: Open the Developer options, locate the USB debugging option and activate it by clicking on it.
Step 7: Click on the OK button to proceed.
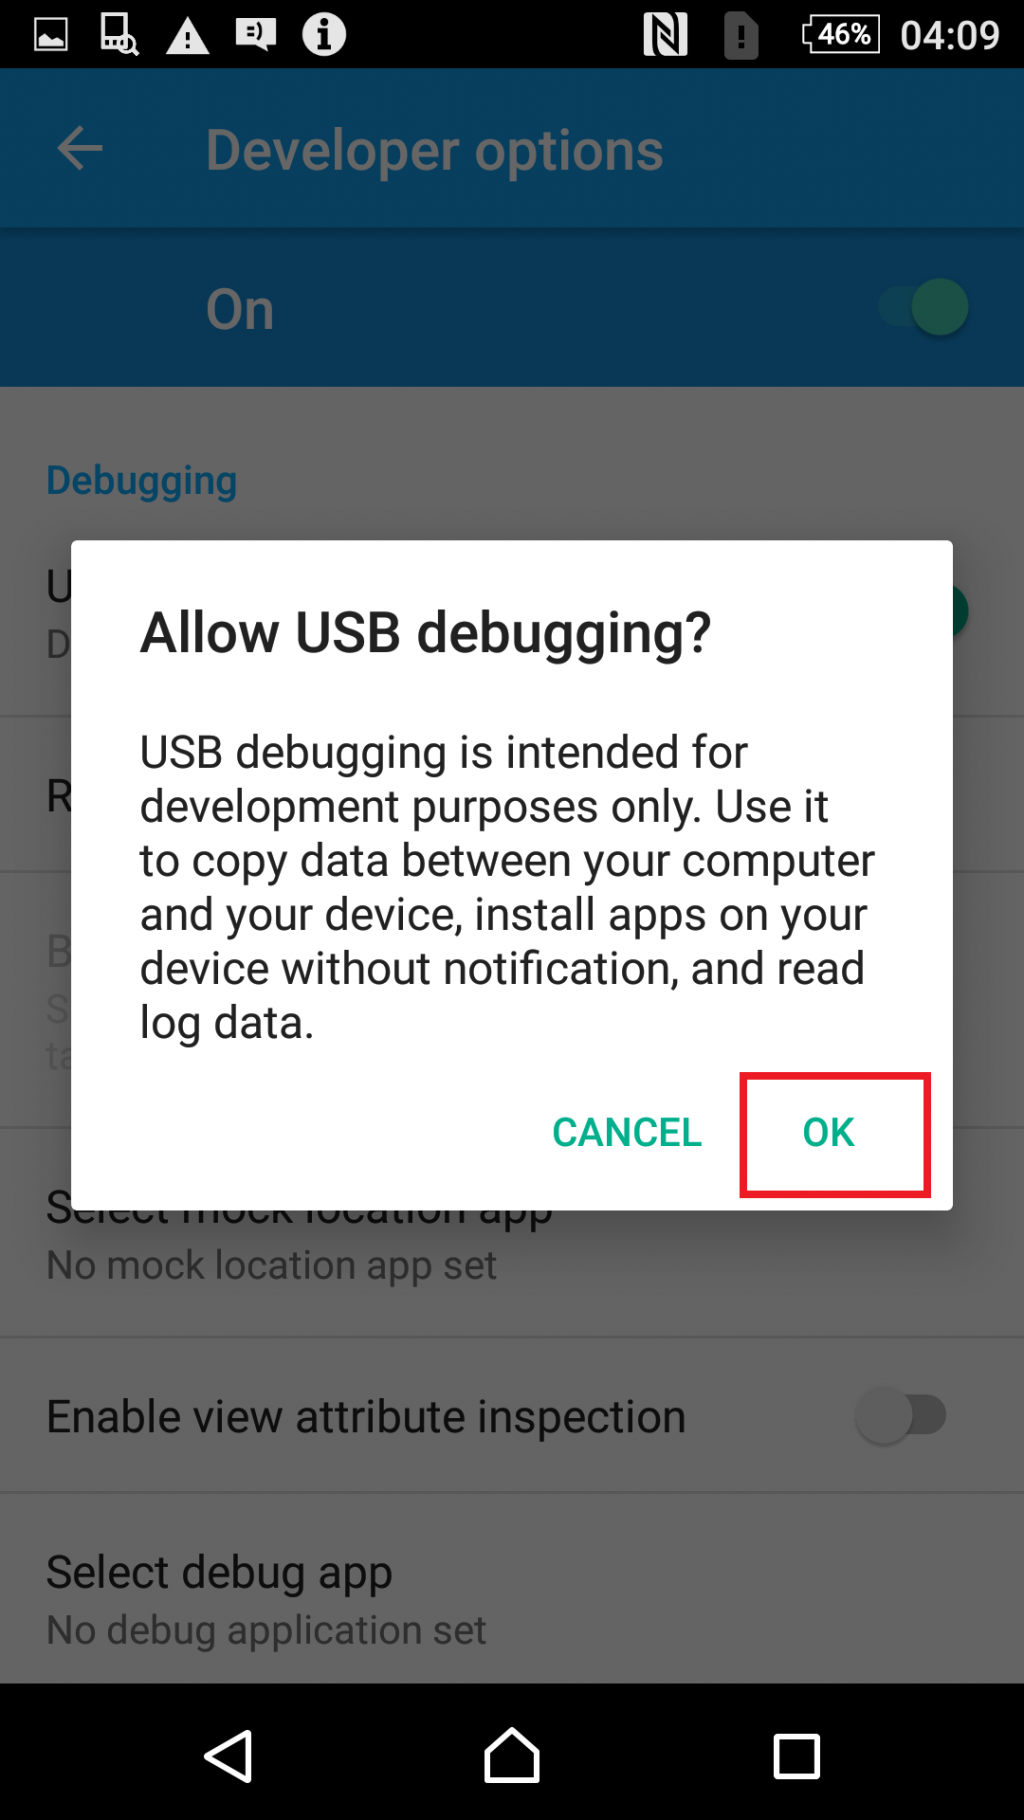
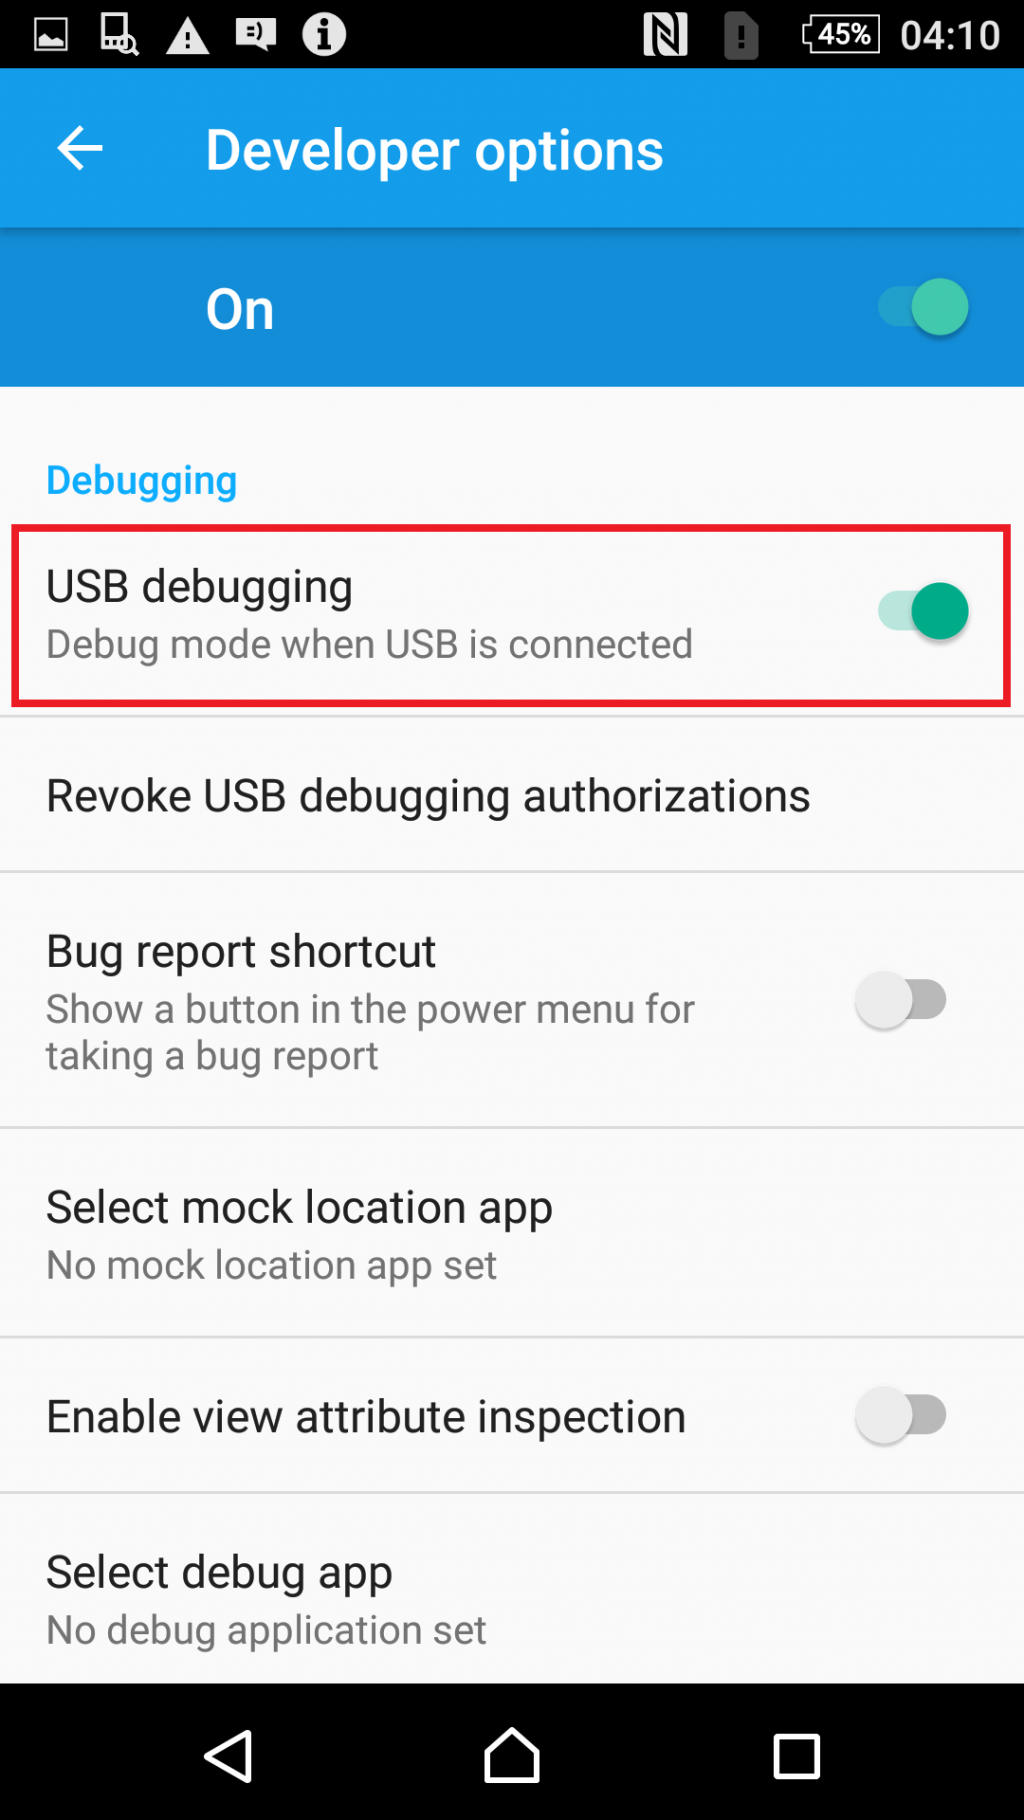
The USB debugging option will be enabled successfully.
You have now completed the necessary preparation steps for your device. To proceed with securely erasing all data, please continue to the Wiping Sony Device documentation for detailed instructions on initiating and completing the wipe process on the device.